The ideas here run from a chalkboard sign you letter yourself and fix with a damp cloth to a marigold-draped wooden platform built under backyard trees, so the real divider is how many days you have and how many hands will help.
A short timeline favors small pieces you can repeat, like chair decorations or lanterns; a longer one leaves room for bigger builds like the ceremony arch, the hanging tree canopy or the marigold mandap.
1. Rustic Flower Girl Sign
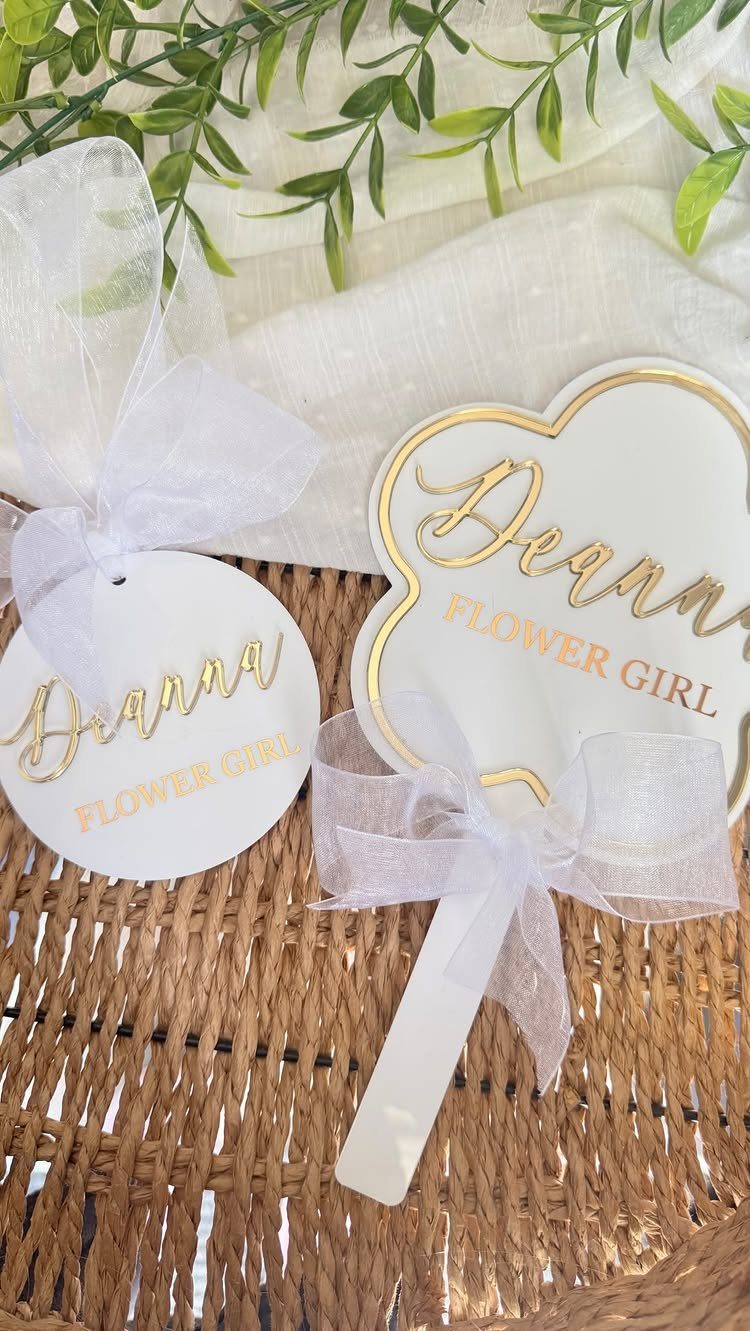
A flower girl sign costs little and gets noticed. Pairing a round tag with a handheld sign, both lettered in gold with her name, gives her something to carry down the aisle and a keepsake afterward.
White ribbon ties keep the look soft, and a woven basket with greenery gives the pieces a place to sit before the ceremony. I would letter the name large enough to read from a few rows back.
2. Rustic Wooden Wedding Welcome Sign
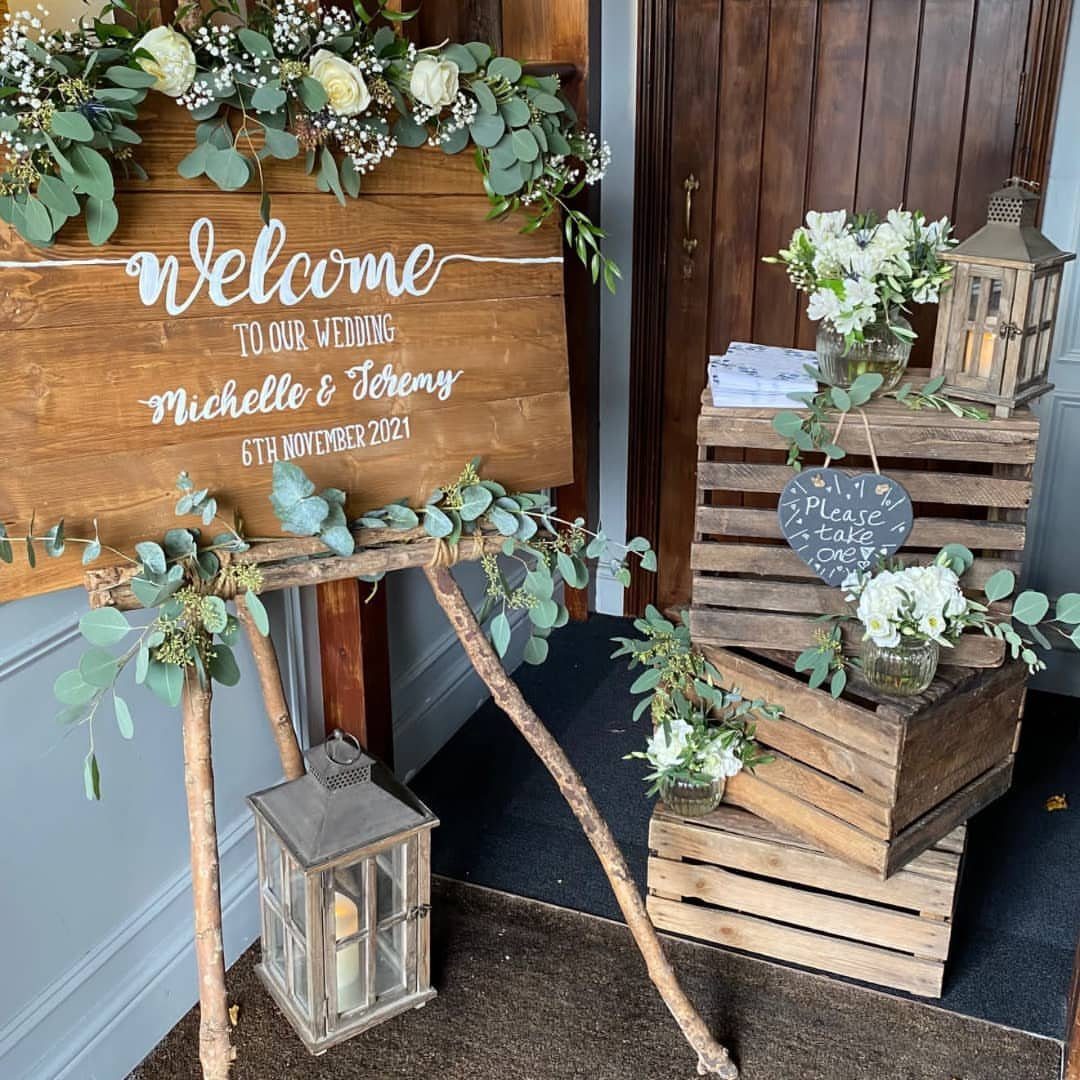
Names and a date are all a welcome sign really needs, and a wooden board lettered with "Michelle & Jeremy" and the day does that well.
For a home wedding, I like setting it beside the front door, where guests see it before anything else.
A branch easel keeps the rustic feel without a store-bought stand. White flowers and a pair of lanterns at its base finish the corner, and you can reuse them elsewhere afterward.
3. Handmade Floral Wedding Centerpieces
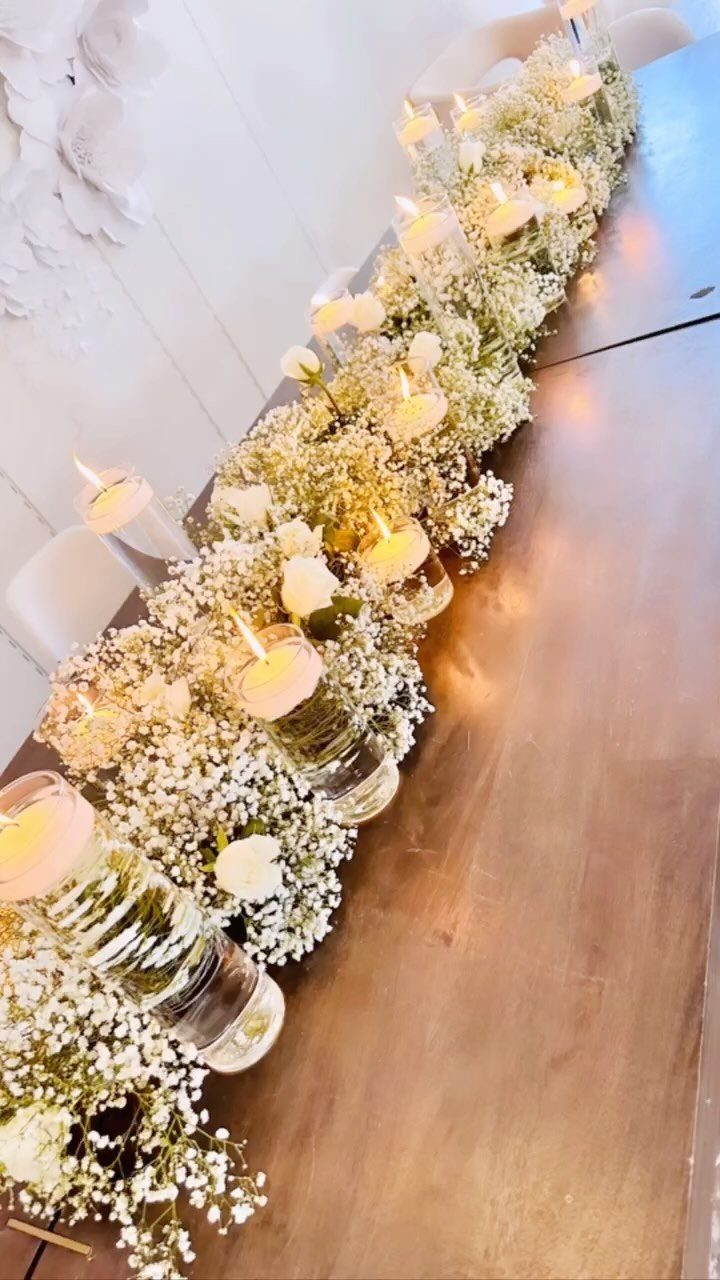
A runner of baby’s breath and white roses down the middle of a long table covers more space than a row of single vases, and baby’s breath is an inexpensive filler flower, which helps a tight budget.
Floating candles in glass cylinders, set between the blooms, add the glow. I would pick this over tall arrangements at a home dinner, since guests can see one another across the table.
4. Chalkboard Welcome Sign
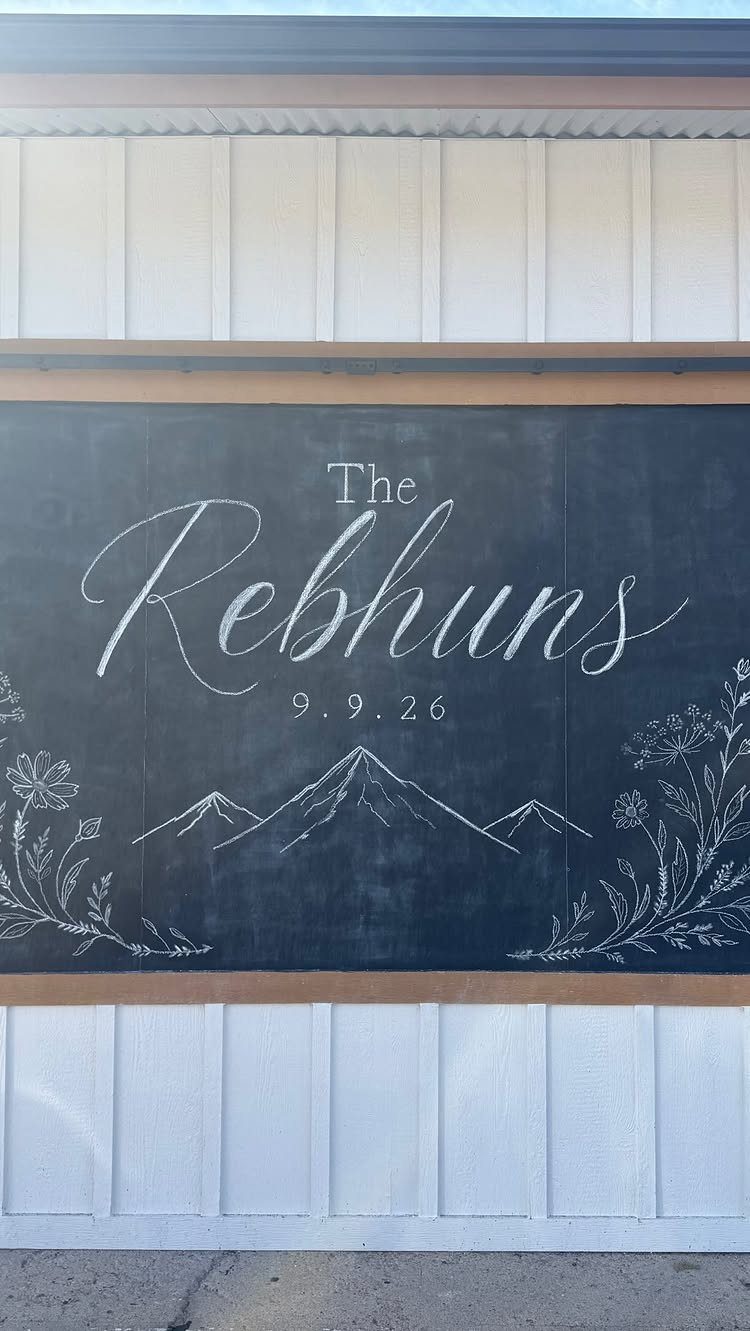
Chalk lets you write the sign yourself and fix mistakes with a damp cloth.
Add a few drawn mountains or flowers around the words if you have a steady hand. Practice the lettering on paper first, then commit to the board.
Lean it against a white wall near the entrance and it looks deliberate without costing much.
Greet guests in style with a framed, personalized chalkboard. Accented with beautiful typography and clusters of baby blossoms, this decorative piece sets the tone for the wedding ahead and can easily be customized with little details that represent you.
5. DIY Wedding Backdrop
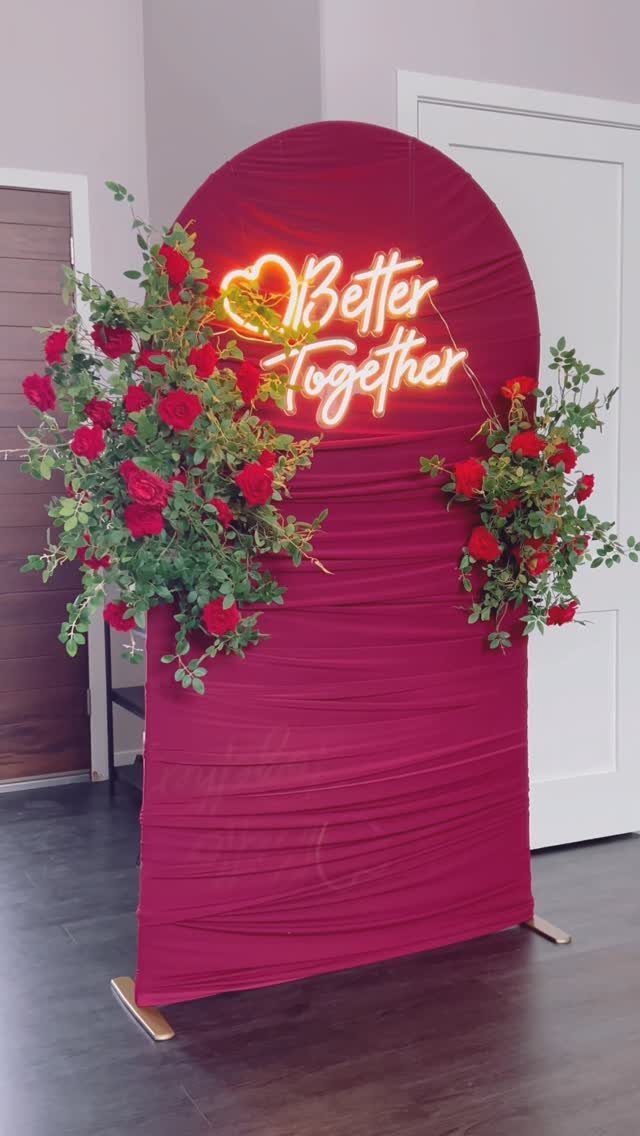
Red fabric hung in a circle behind the couple turns a plain room into a ceremony spot and a photo corner at once.
Fresh or faux red roses along the edge add depth, and a neon "Better Together" sign gives it a modern edge.
A bold backdrop like this works best against a simple wall, so keep everything else in the room quiet. I would choose faux roses if you build it days ahead.
6. DIY Wedding Chair Decorations
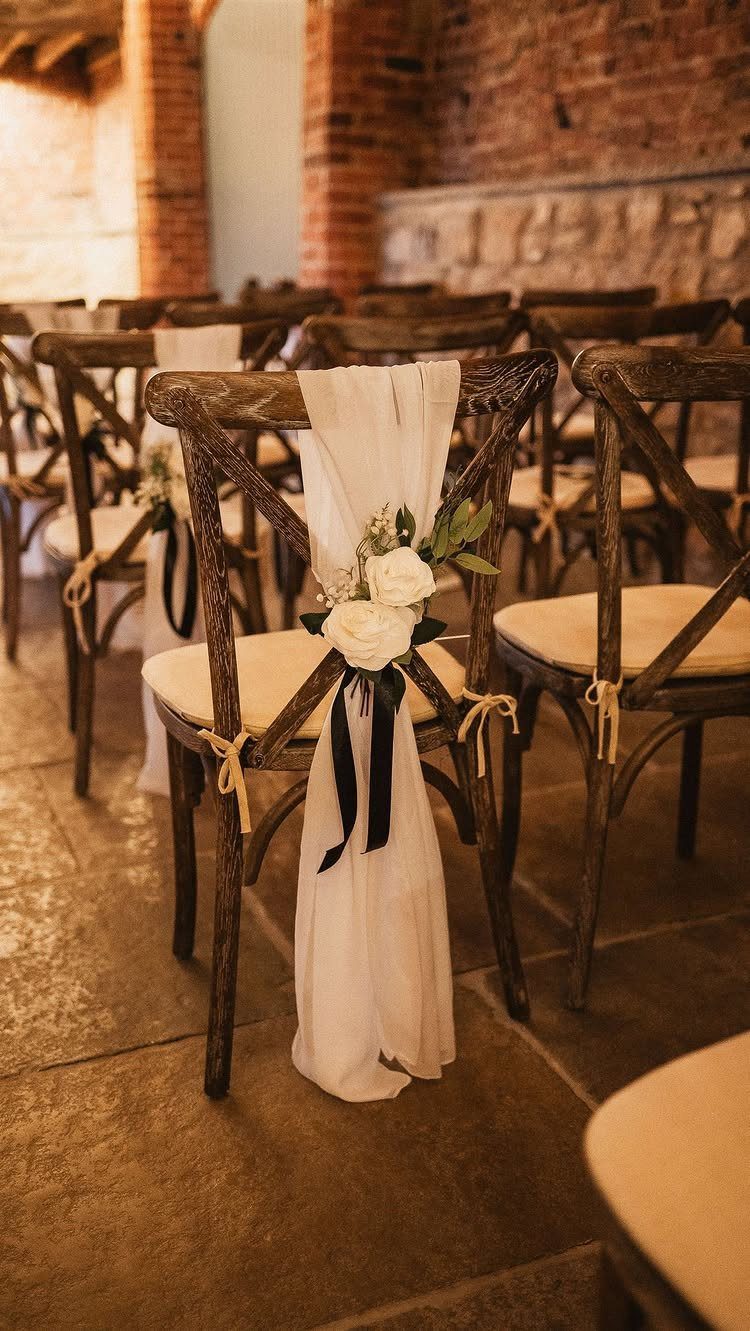
Chairs mark the aisle, so dressing them shapes the whole ceremony space.
White fabric draped over a cross-back chair, a black ribbon tied around it, and a white rose tucked in at the knot are simple steps you can repeat down every row.
Decorate only the aisle-side chairs if the count worries you. Do one test chair first and see how long it takes before multiplying by your guest list.
7. DIY Wedding Ceremony Arch
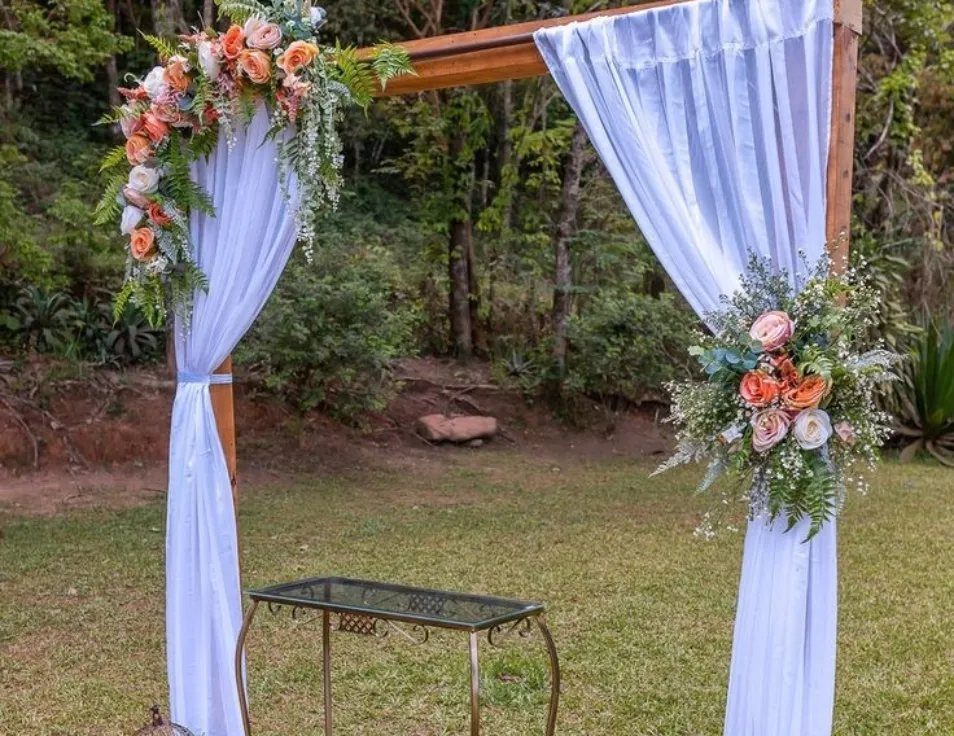
A wooden arch dressed in white fabric and peach and white florals frames the exact spot where you say your vows, which is why it earns its place in a home ceremony.
Set it on level grass, with the flowers gathered at one side instead of spread across the whole frame.
Faux or fresh both work; I would pick fresh only if the ceremony is within a day of building. Drape the fabric first, then attach the florals over it so the stems hide the knots.
8. Personalized Place Cards
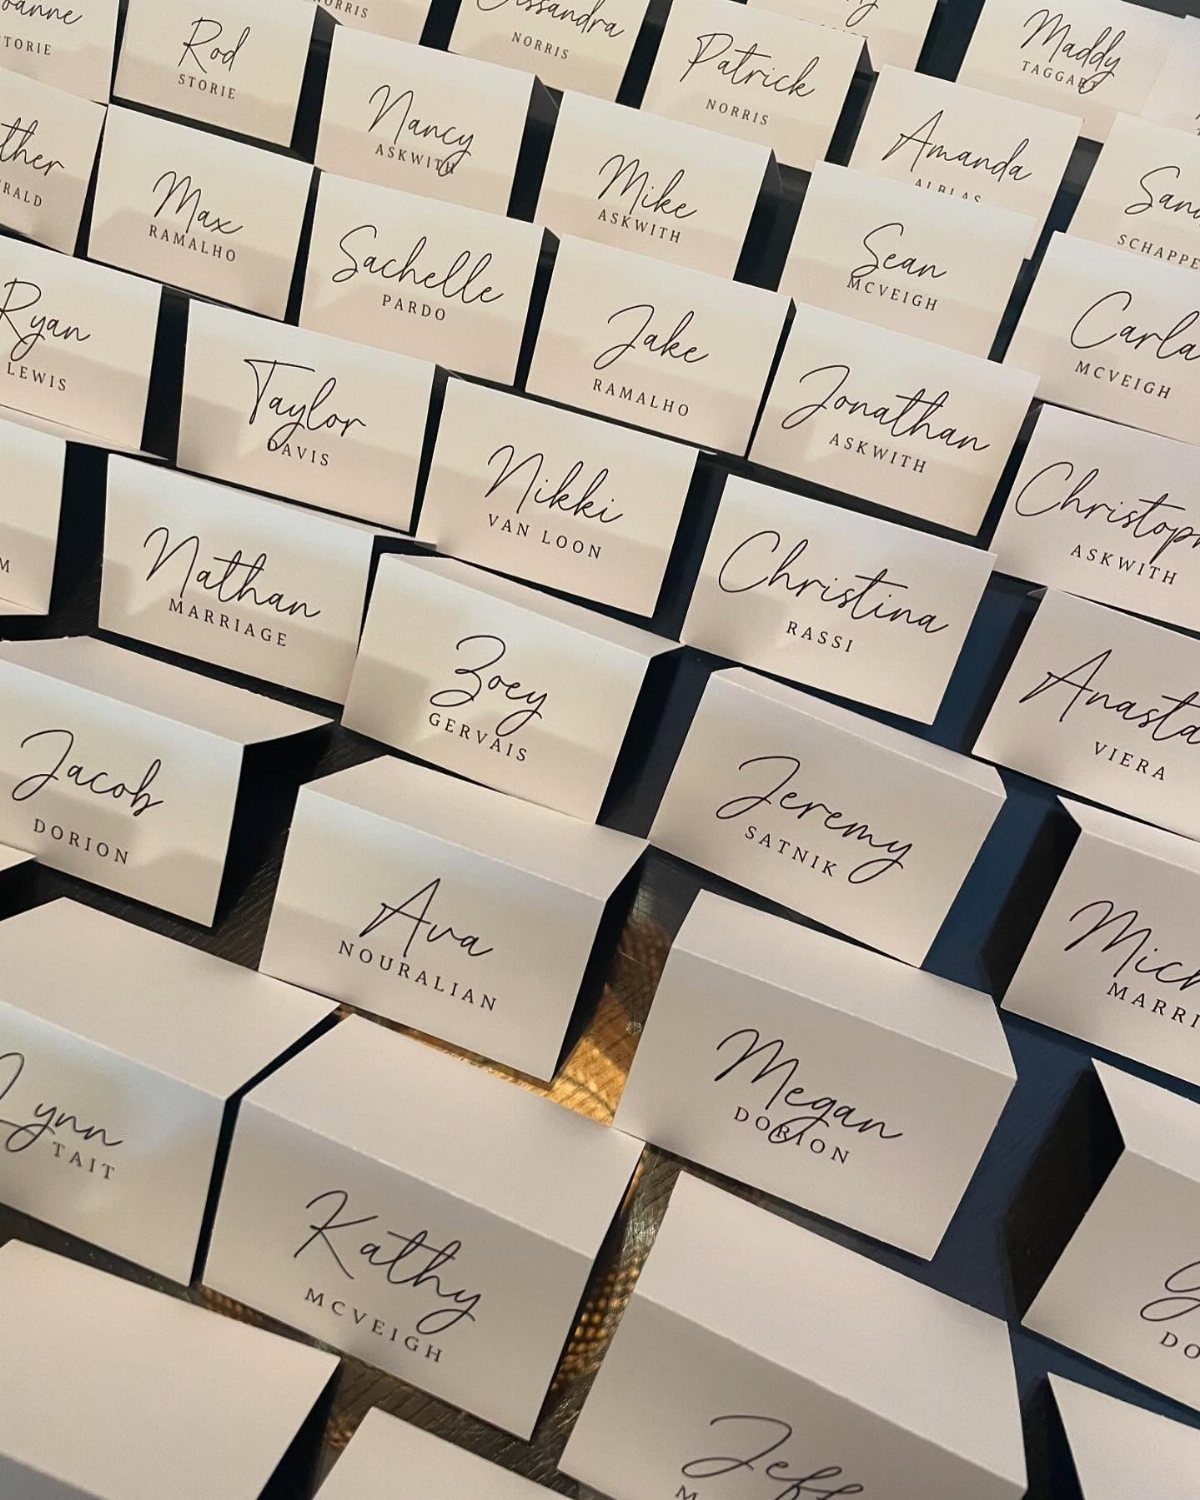
Printing each guest’s name in cursive on a folded white card makes a seat feel chosen, and it costs a few cents per card.
Blue ink on white, set out in tidy rows, also gives you an easy way to sort guests by alphabet.
Print a few extras in case of misspellings or last-minute additions. I would check every name against the invitation list before printing, because a wrong spelling is the one error guests notice.
9. DIY Wedding Lanterns
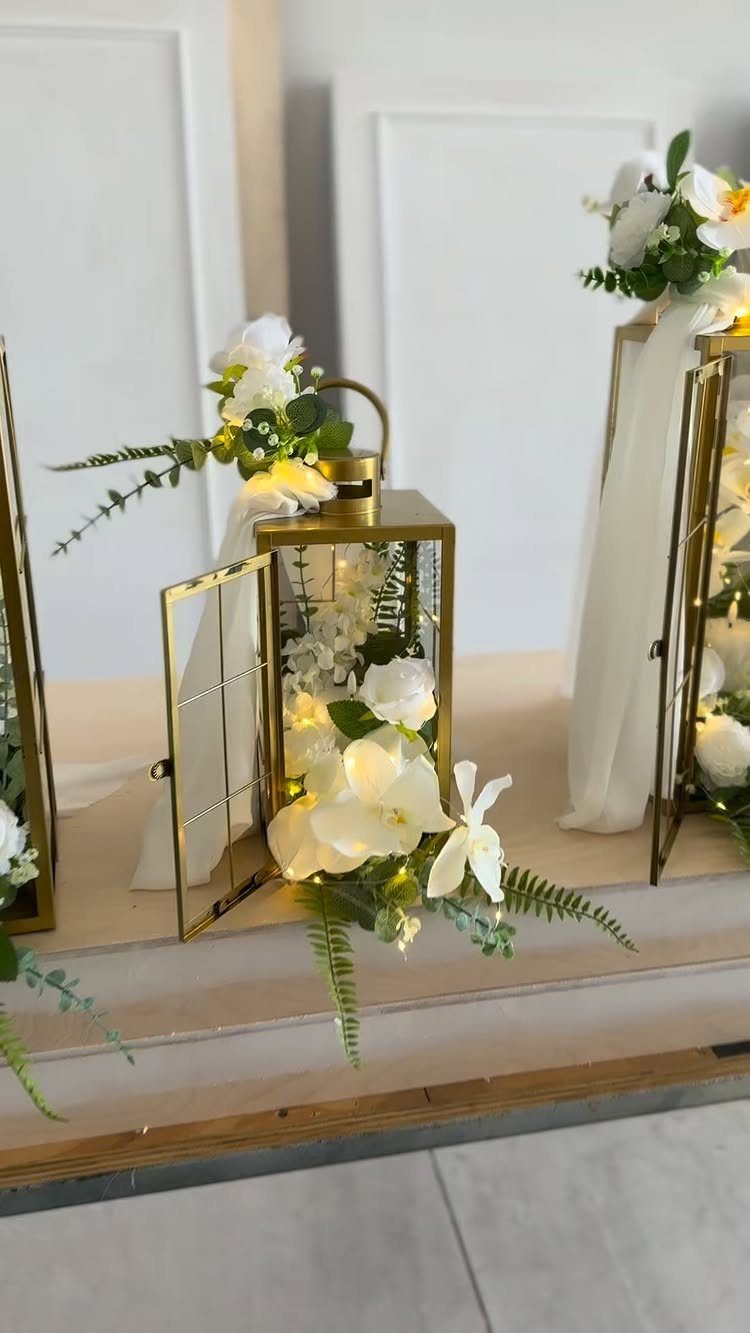
A glass lantern with a gold frame becomes a soft centerpiece when you tuck white flowers and greenery around the base and wind a strand of battery-powered fairy lights inside.
Battery-powered lights are my choice for a home wedding, since there is no flame to watch and no cord to hide.
Build one as a test and check it after dark. Then repeat it along a ledge, steps or the edge of a patio.
10. Memory Table Decorations
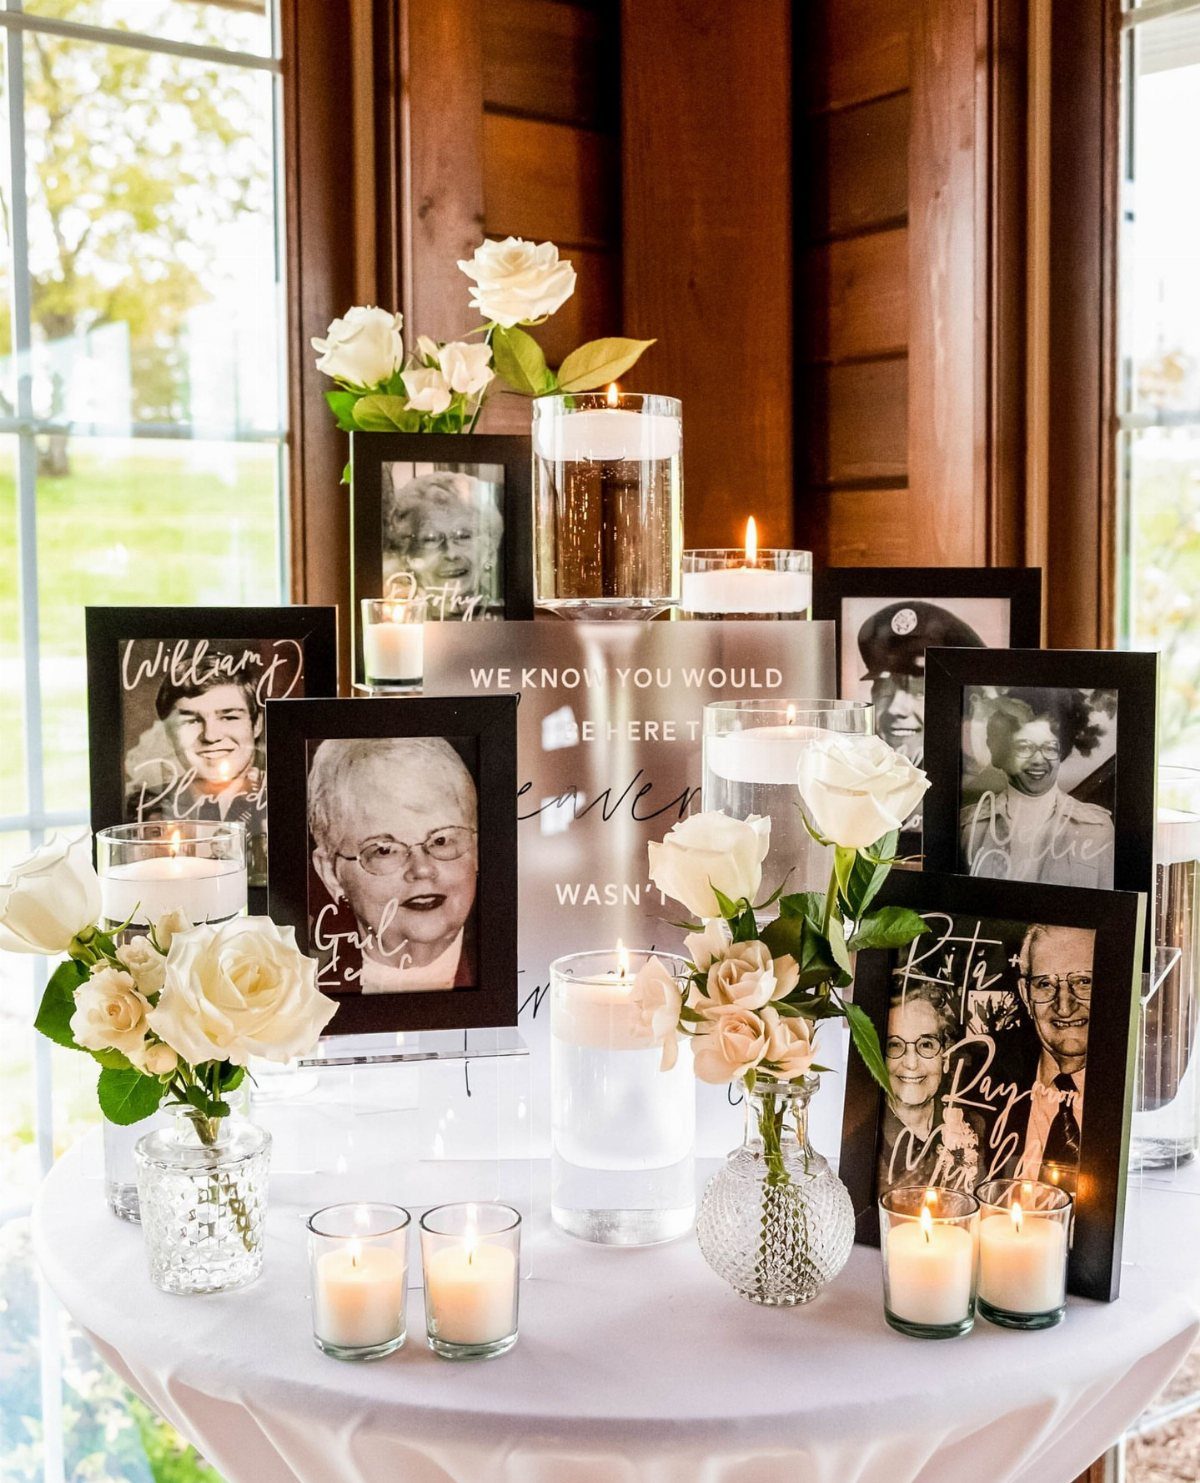
A short handwritten line on a sign, kept simple, says what the table is for.
Put it near a window so daylight softens the photos.
I would use matching frames, which makes mixed old prints look like one collection. Keep candles away from the cloth edges, or switch to flameless ones.
11. DIY Wedding Dessert Table
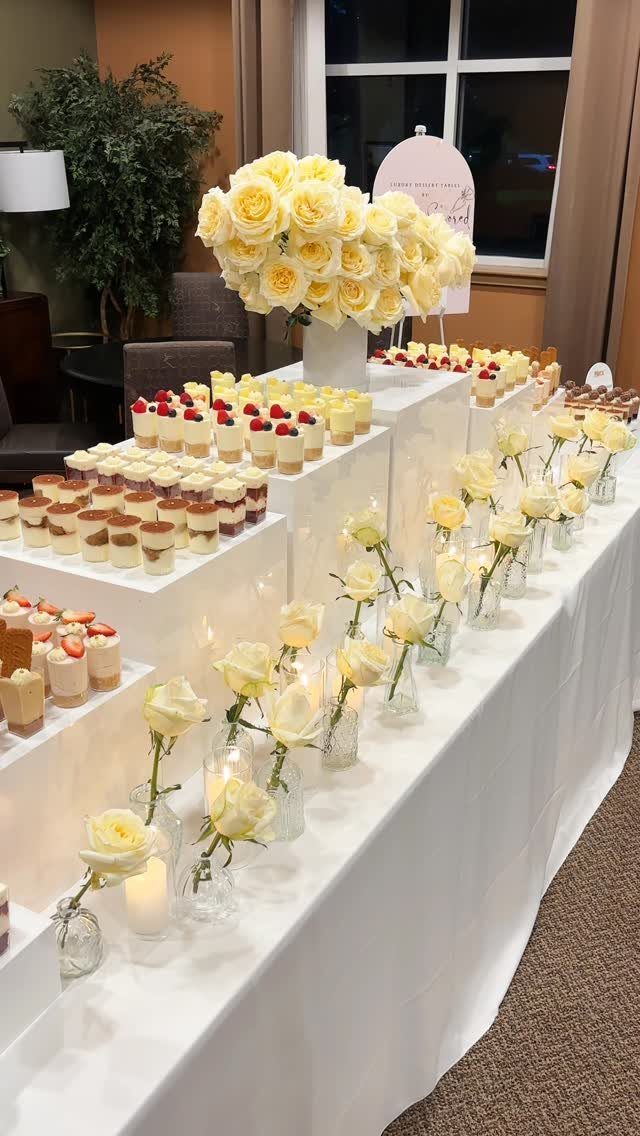
Mini cakes on tiered stands let you serve dessert without cutting anything, and a few vases of roses double as decor for the table.
Stack the stands at different heights, with the tallest piece, such as a large rose arrangement, in the center.
Bakery minis or ones you bake yourself both work, and I would bake in batches a day ahead to keep your wedding morning calm.
12. DIY Wedding Table Runners
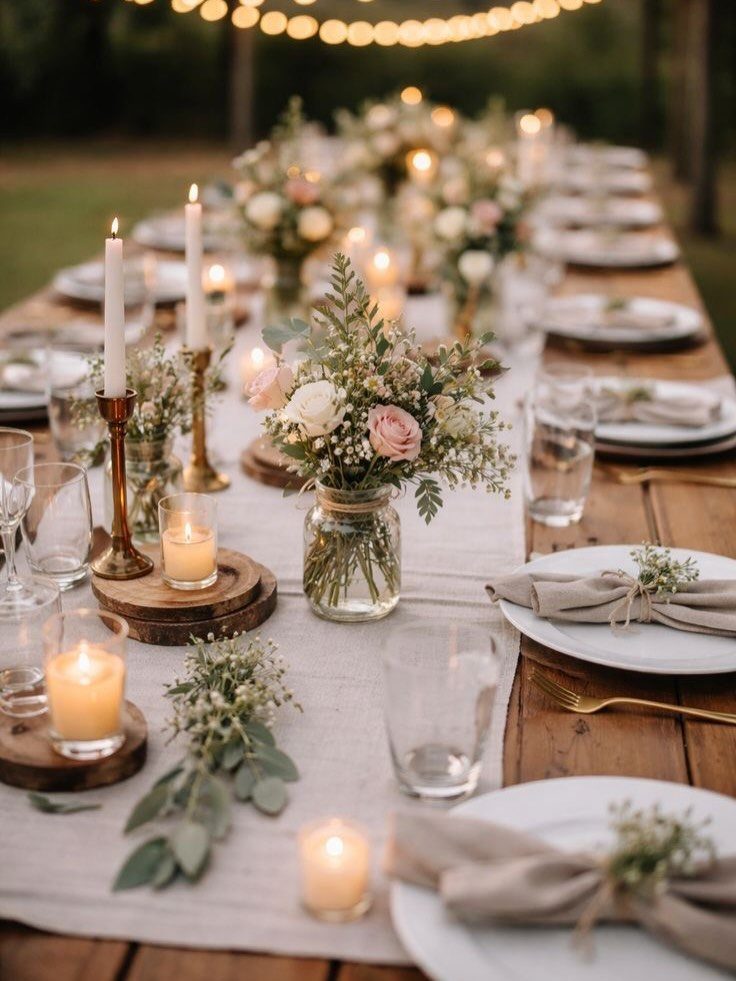
Cut the fabric longer than the table so the ends hang over.
I like plain cotton or linen-style cloth, since it is easy to hem or leave raw-edged. Keep the centerpieces low enough to see over, and leave room for each place setting.
13. DIY Wedding Guest Book
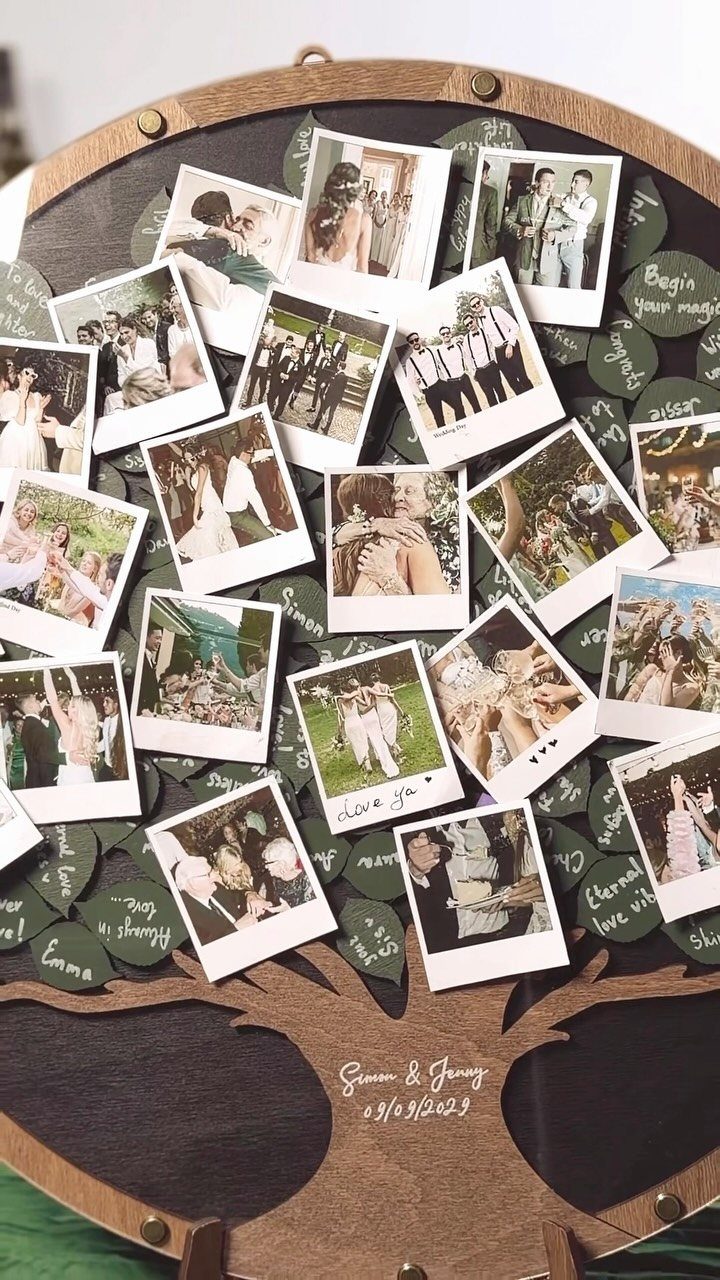
A guest book shaped as a tree turns signatures into something you can hang on a wall.
Guests add a Polaroid and a leaf note to the branches, so the finished piece holds faces and messages together, and it becomes a family keepsake.
Set out a stack of paper leaves, a pen and an instant camera, then ask a friend to hand them out. I would test the pen on the leaf paper first, since some inks smear.
A round wooden frame works well as a guest book because guests sign the wood or a mat inside it, and you can hang it at home afterward.
14. DIY Wedding Balloon Decorations
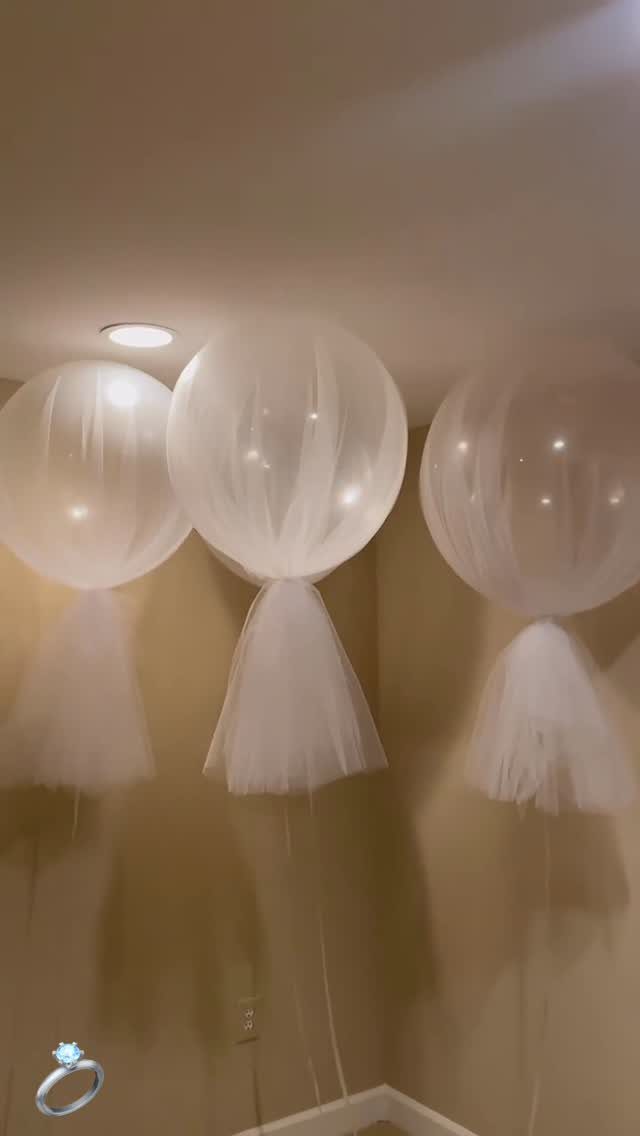
Balloons skirted in tulle look softer than plain latex, and white keeps them elegant.
I would stay with one color and a single cluster near the entrance or cake. More than that and the look tips from elegant to party store.
15. DIY Wedding Memory Table
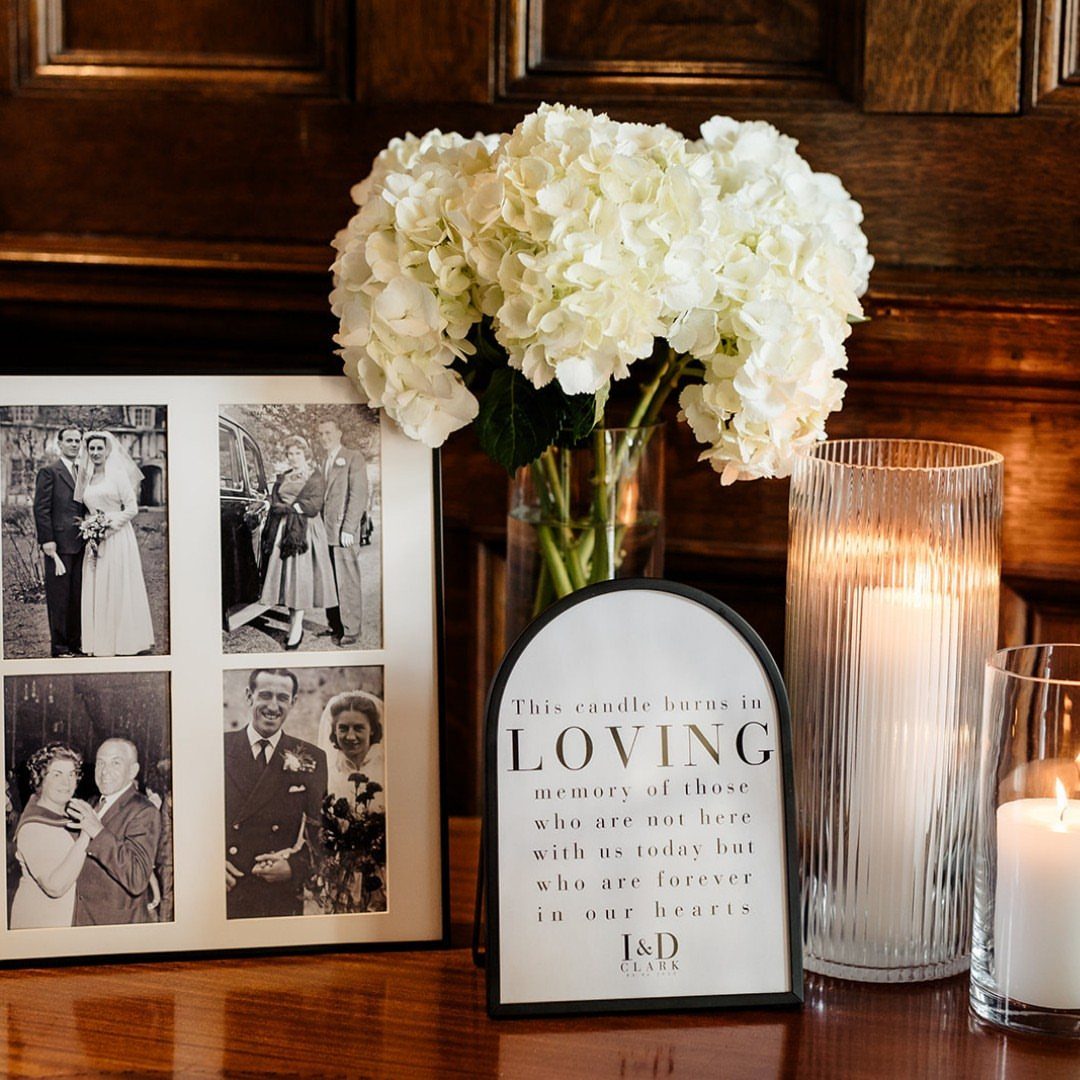
Framed vintage wedding photos, white hydrangeas and 2 candles give a memory table its calm. A small sign with a short line about who the candle honors tells guests why the table is there.
I would choose one large collage frame over many small ones, because it reads as a single tribute. Flameless candles are my pick if guests will crowd the table.
16. Decorated Staircase Railing
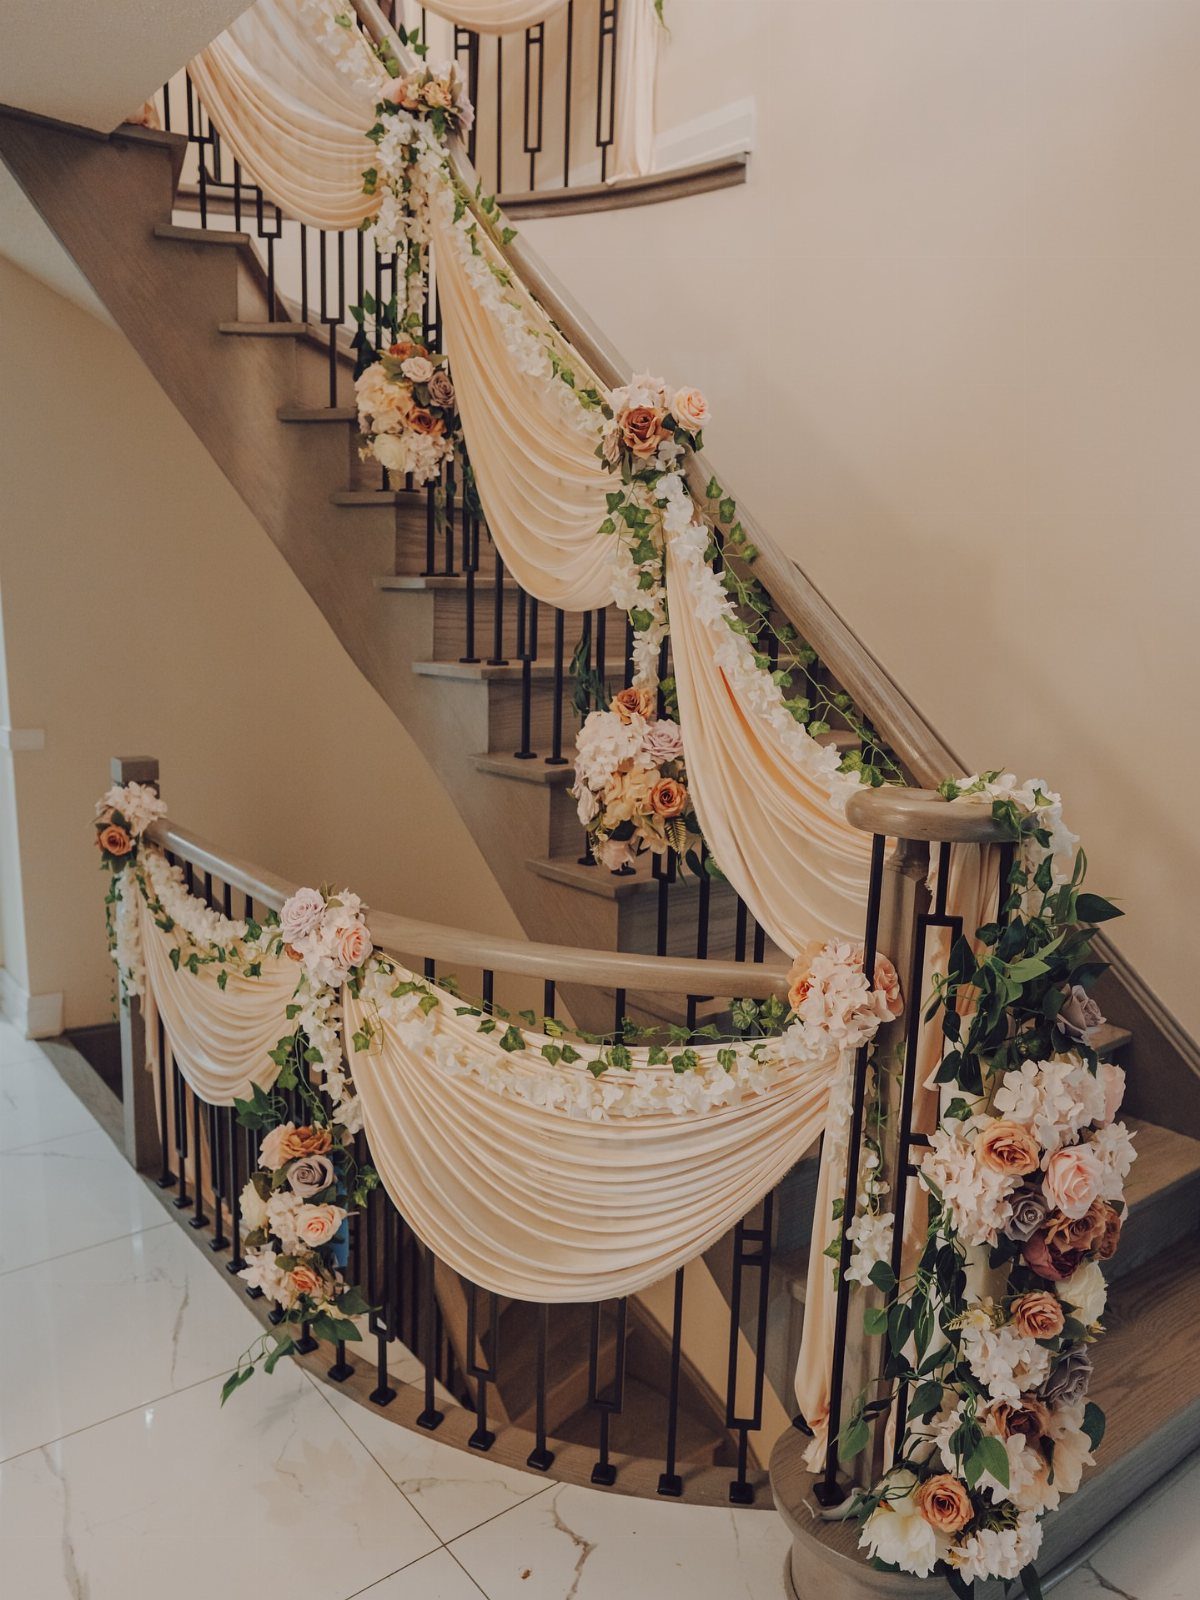
Cream fabric swagged along a banister, with peach and white flower clusters spaced between the drapes, makes a staircase part of the wedding. It works well in a home with a curved stair, since the fabric follows the line.
Fasten the swags first, then add the flower arrangements over the gathered points so they hide the ties.
17. Decorated Doorway Entrance
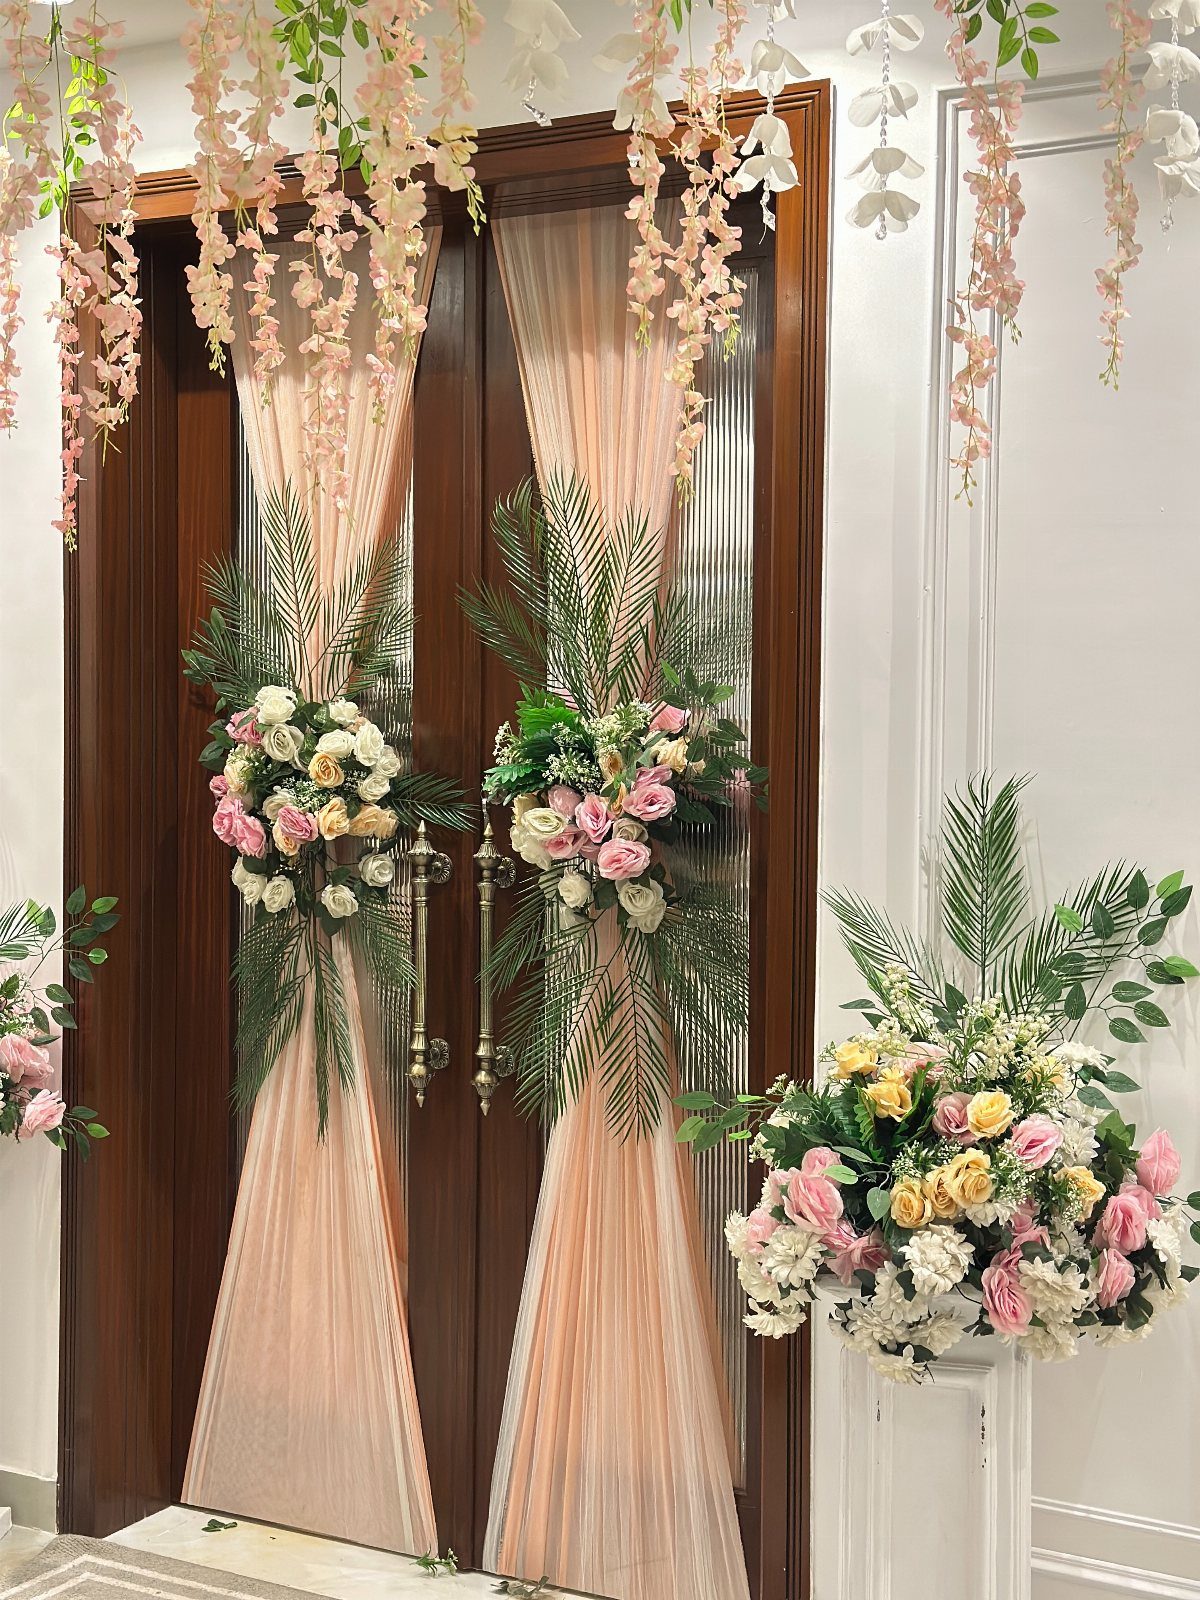
Peach fabric draped around wooden double doors, with rose bouquets at the sides and white and pink flowers hanging above, makes the entrance feel like the start of the day. Guests walk through it before anything else.
Hang the fabric first, then the florals. Matching the doorway colors to your ceremony flowers ties the entrance to the rest of the house, so pull 2 or 3 shades from your bouquet.
18. Hanging Tree Canopy Decor
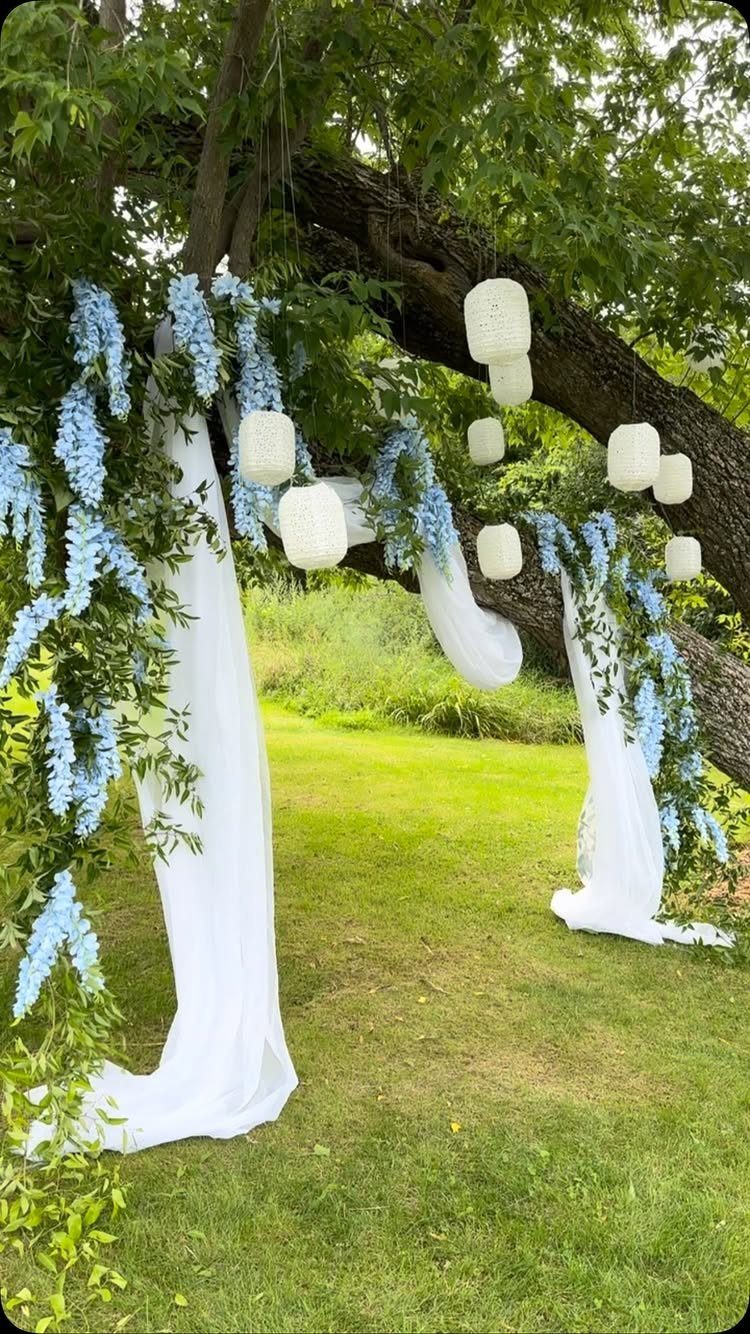
A strong tree branch can hold the whole decoration: white fabric draped from it, light blue flower garlands hanging down, and white paper lanterns for height. Paper lanterns are light and cheap, which suits a budget.
Pick a branch that clearly holds your weight in the hanging pieces, and tie each drape securely. I would hang everything the day before and check it from where guests will sit.
19. Marigold Backyard Mandap
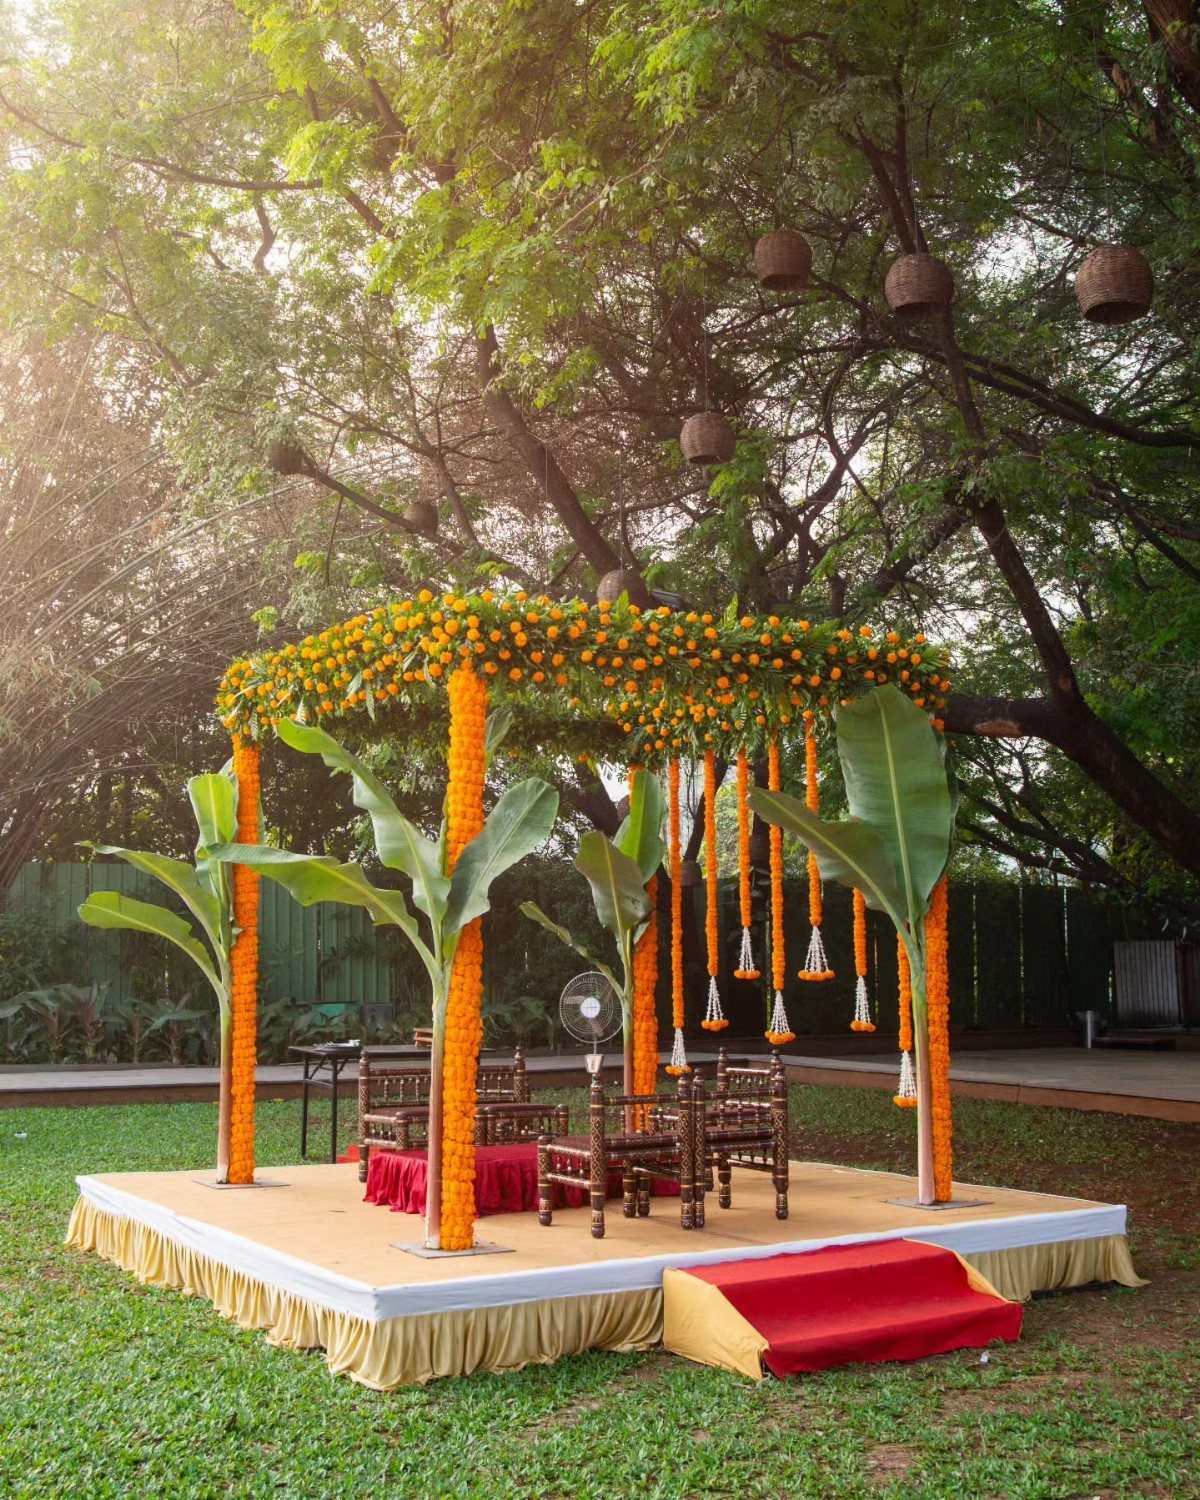
Marigold garlands are inexpensive to string and look rich in a backyard, which makes them a good fit for a budget home wedding.
Here they cover the canopy of a raised wooden platform, with banana leaves adding green and wooden chairs set close.
Build the platform and canopy frame first, then hang the garlands over the top so the leaves and flowers cover the joins. I would place it under large trees, where the shade keeps the setup comfortable during the ceremony.
Keep the lawn around it plain so the orange stands out.
Budget-friendly Decoration Tips
Decor is the easiest line in a wedding budget to trim, because guests remember the food and the music long after they forget who made the centerpieces. Spend where people notice and save where they only glance.
Pick the projects that set the atmosphere and let the rest stay simple. A few handmade pieces in the right spots do more than a house crowded with small crafts.
Rustic is a popular theme right now, and it suits a tight budget since it leans on natural materials and handmade touches.
Clean glass milk bottles work as bud vases, and a few of the easiest crafts look store-bought enough that guests will assume you ordered them.
Pick a decor number first, and stop shopping the moment you hit it.
Personalization in Decor
Guests rarely remember the priciest pieces in the room.
Ask what each piece says about the two of you. If a detail could belong to any couple, it needs a second look; if it connects to something real in your history, keep it.
Pick 2 or 3 projects that mean something to you and leave the rest of the room simple. Three details that carry a story will land harder than ten that only match the color scheme.
DIY Project Management
Decor is there to set a mood, and it shouldn’t turn your last week as a single person into a craft marathon. Pick a few projects and set a finish date for each, well ahead of the wedding.
Start with the pieces that take the longest or can be made far in advance, and leave anything perishable for last. Build one test version of each project so you know the real time it takes before you commit.
Pack finished pieces in labeled boxes by location, such as entrance, ceremony and dinner tables. Whoever sets up on the day can then work without asking you questions.
Aim to have everything done and boxed several days before the wedding. Keep those final days for yourself, with no glue gun in sight.