Personalization is what separates the cheap DIY wedding gifts from the pricier ones, so the first question is whether your gift budget can stretch to a custom cutting board or a personalized ceramic ring dish.
If it can, the cutting board, the glass flutes and the housewarming basket all hinge on a name or date cut into the surface, and a misspelling can’t be undone.
If money is tight, put the effort into a visible detail like the gem-and-flower cover on the photo album, or into the labels on a DIY spa basket.
The list runs from a quick gift basket assembled from the snack aisle to a personalized patchwork quilt that takes weeks.
1. Personalized Photo Album
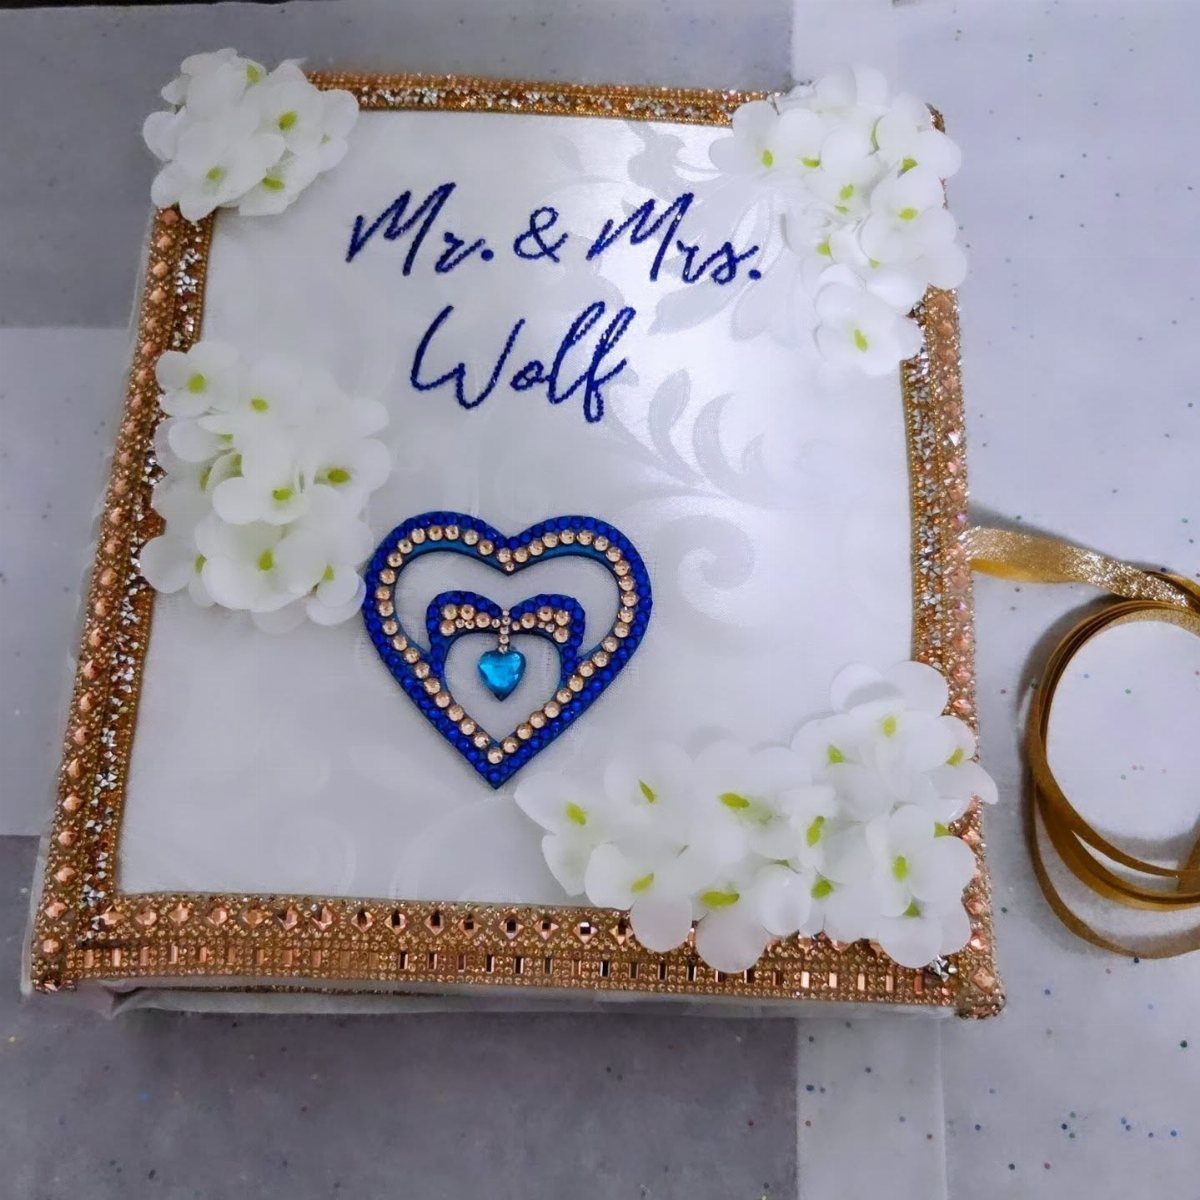
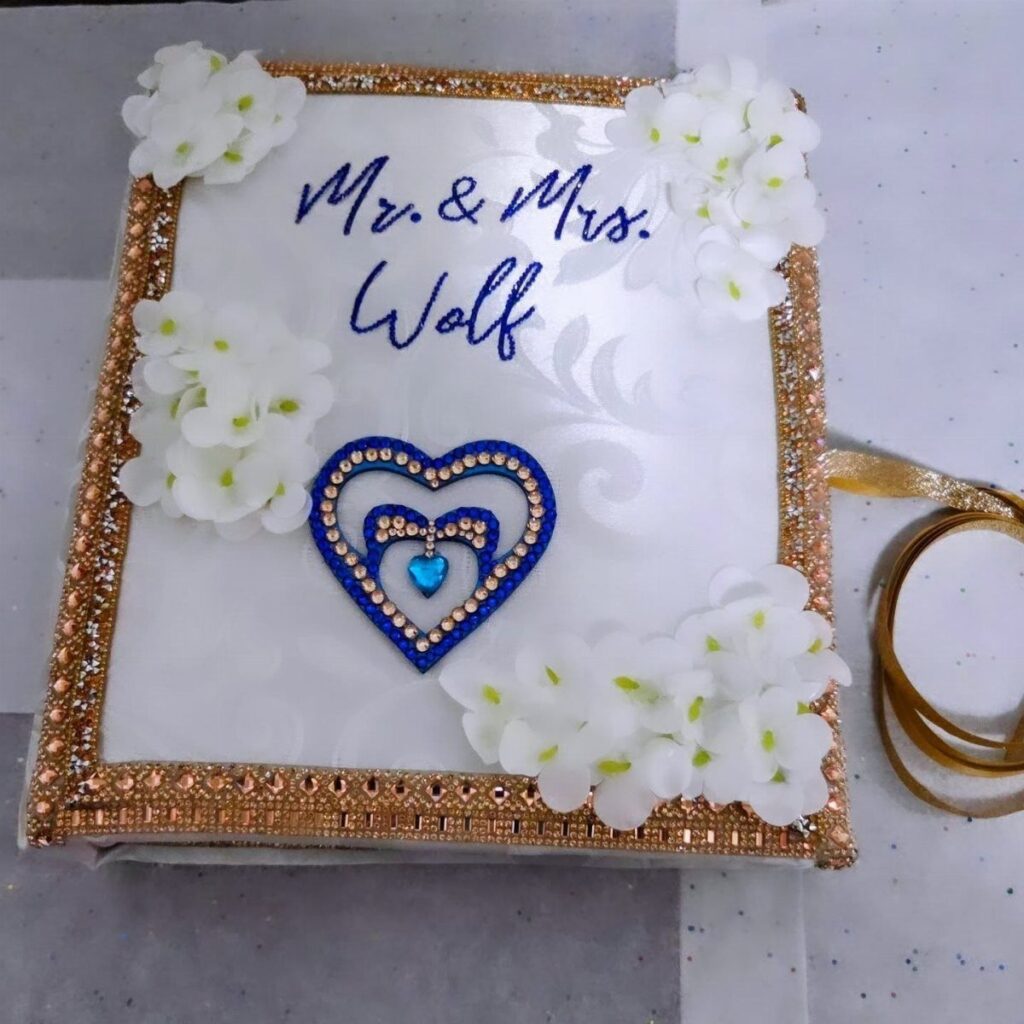
Gold rhinestones, white flowers and a blue jeweled heart turn a plain white album cover into something a couple will actually leave on the coffee table.
A name lettered across the front, "Mr. & Mrs." plus a surname, tells them this one is theirs.
If money is limited, I would spend the effort on the cover and keep the pages simple. Glue-on gems and craft flowers are cheap, and the finished album feels far more personal than anything off a shelf.
Pick one accent color, as blue does here, so the cover reads as designed rather than crowded.
2. Personalized Cutting Board
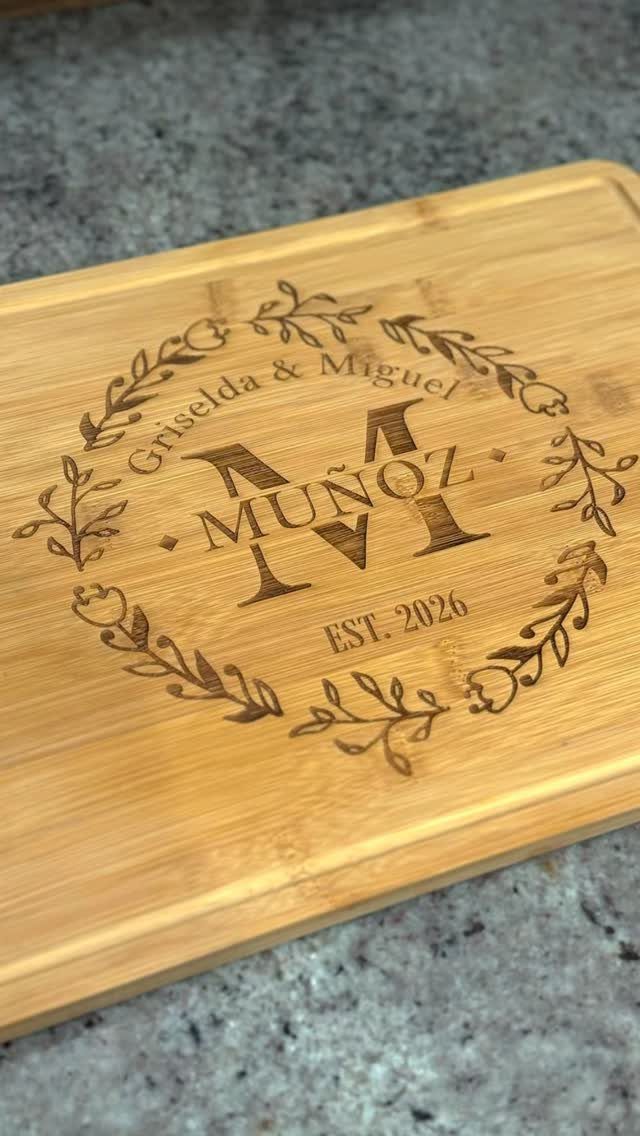
A board engraved with first names, a family surname and "EST. 2026" inside a leaf wreath does double duty: it works in the kitchen from day one and sits on display as a keepsake.
Order of information matters. I like the first names largest, the surname beneath, and the date as a small closing line, because the eye reads it like a title.
Engraving costs more than a plain board, so this suits a gift budget that can stretch a little. Lay out the wording on paper first and check the spelling, accents included, before anything gets cut.
3. DIY Rustic Serving Tray
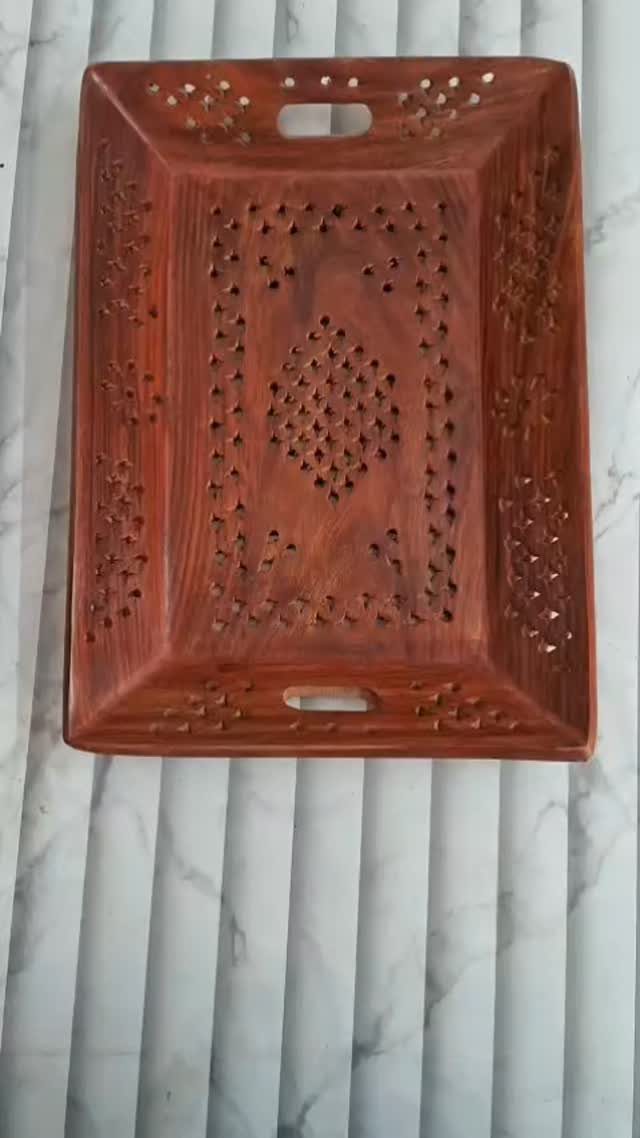
Carved patterns and cutout handles are what make a wooden tray feel like furniture rather than a kitchen tool. Handle cutouts mean no extra hardware to buy or attach.
Of all the wood gifts you could make, I find this one the most forgiving to display. It can carry breakfast in bed, a bottle with 2 glasses, or sit empty on an ottoman.
The carving is the skill-heavy part, so practice the pattern on scrap wood first. If carving feels like too much, a simple border is still handsome.
4. Wire Wrapped Serving Utensils
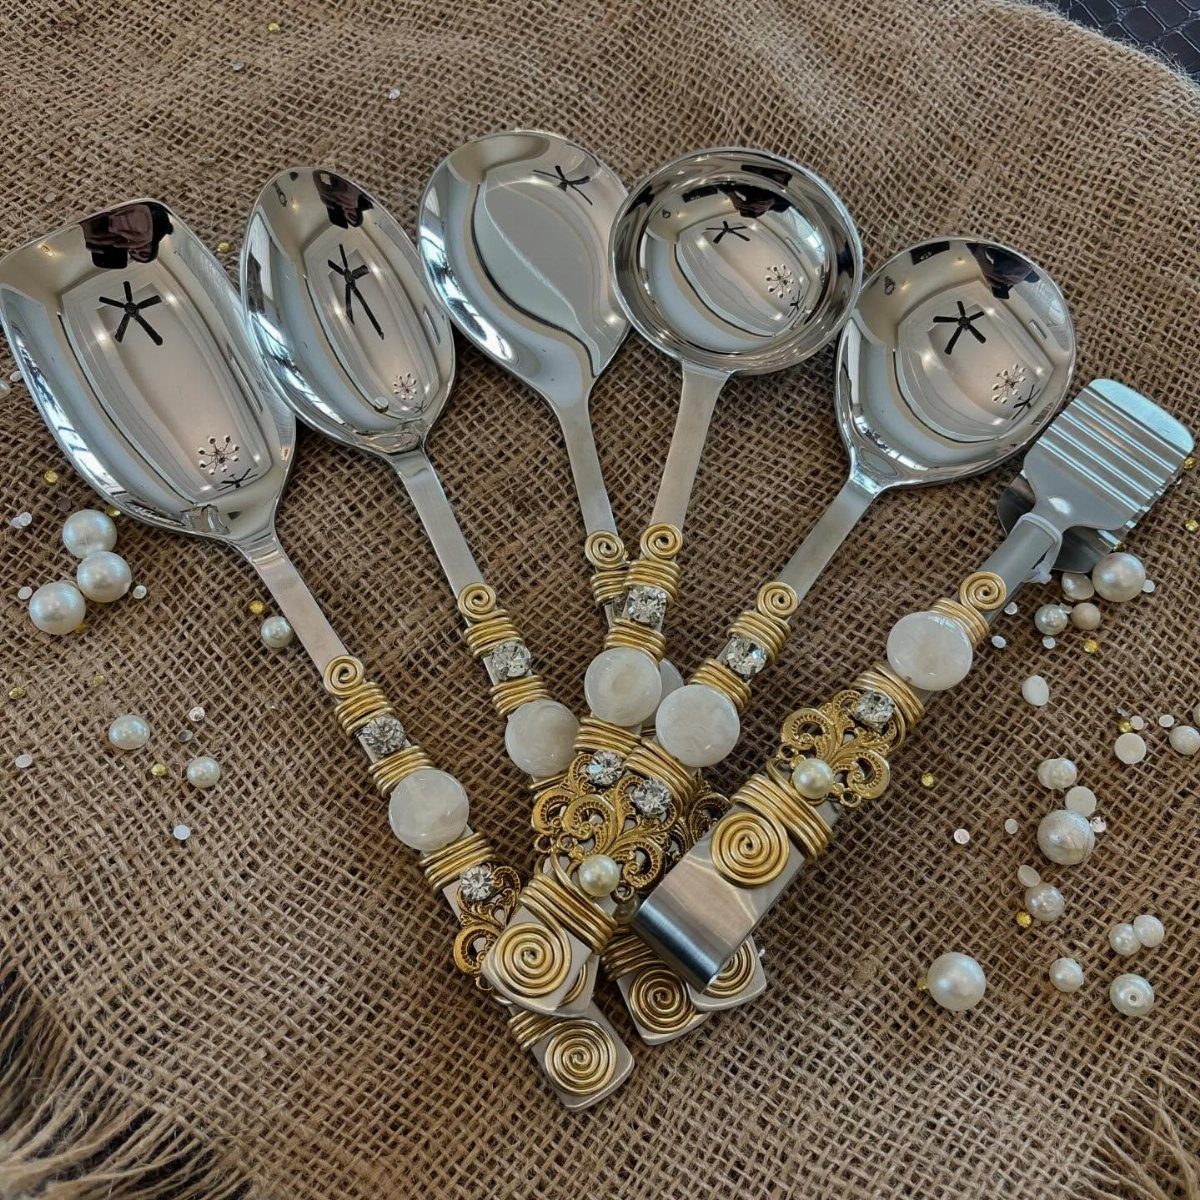
Gold wire twisted around the handles of silver servers, finished with pearls, makes salad tossing feel like part of the table setting. Salad lovers will notice immediately.
The method is cheap: plain silver utensils, gold wire and a handful of pearls. Wrapping the handle in tight, even coils matters more than the pearl count, and a matched set reads as a proper collection.
I would present them on burlap or in a simple box so the gold stands out.
5. Hand-Painted Champagne Glasses
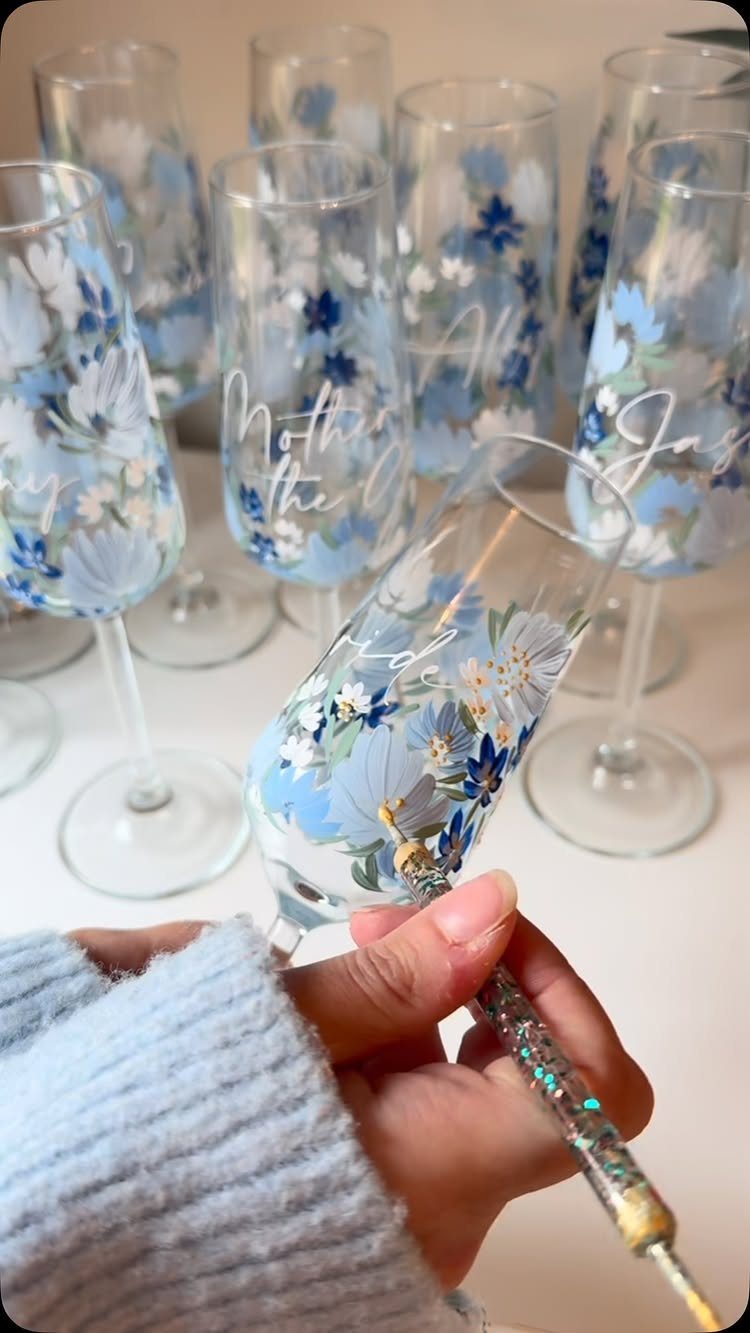
Blue flowers and a short line of text, painted by hand on a champagne flute, give each glass a soft, personal look no store sells. Making several in a matching style turns them into a set for the toast.
Soft, elegant styles work best here, and I think restrained florals age better than loud designs.
Paint one glass first and look at it in good light before doing the rest. Keep the words short, since small lettering on a curved surface is the hardest part.
6. DIY Spa Basket
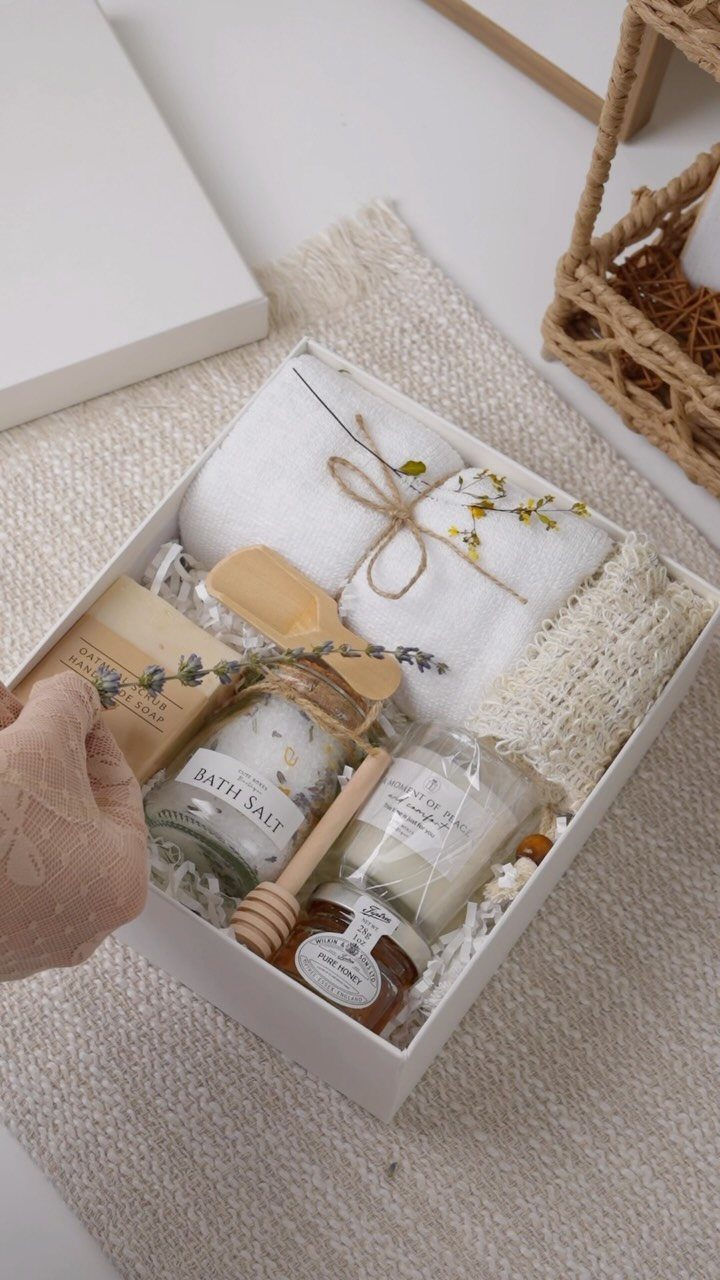
Towels, bath salts, honey, a sponge and a bar of soap fit neatly into a white gift box, and the labels "BATH SALT" and "OATMEAL SCRUB" make the homemade items look finished.
Labels do the most work here. Handwritten or printed, they turn jars of kitchen ingredients into something that feels bought.
This is a good pick for a modest budget, since the pieces can be made or bought in small amounts. I would stay with white towels and one or two scents so the box feels calm, not cluttered.
7. Cozy Movie Night Basket
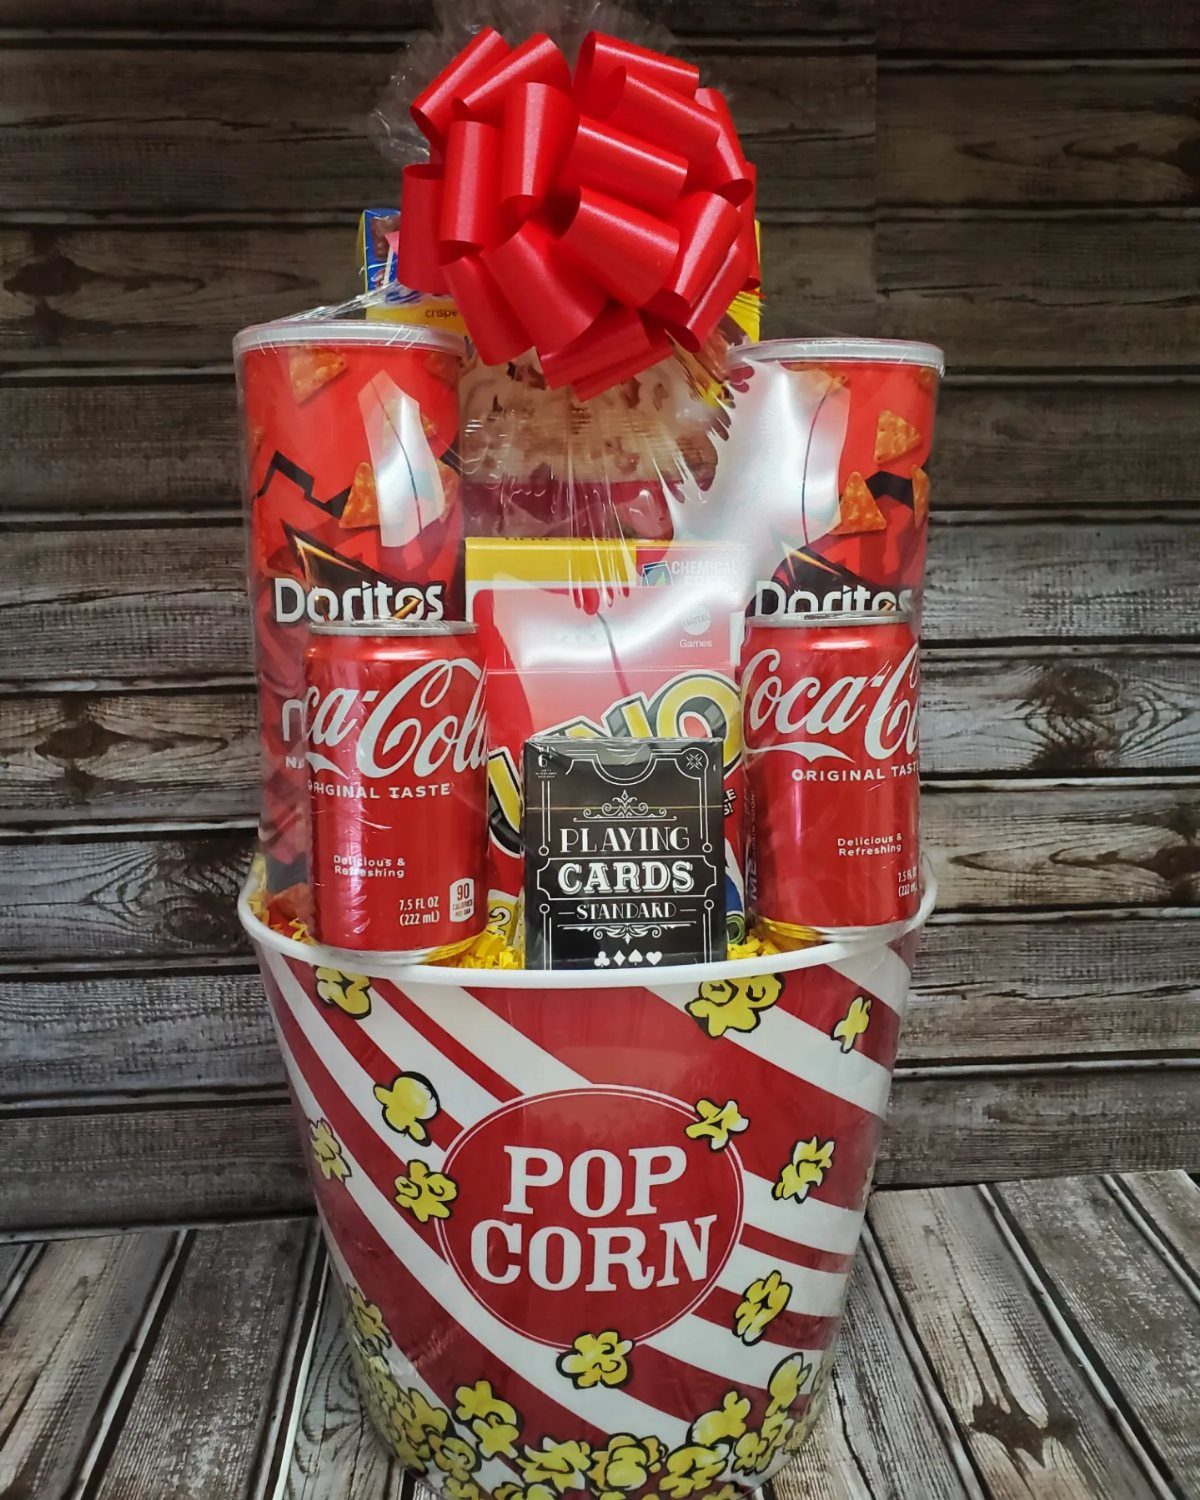
A popcorn bucket makes a better container than a basket, since it doubles as the first snack bowl of the night.
Pick snacks the couple already eats. Adding a game means the evening goes beyond the screen, which suits a date night at home.
Shop the snack aisle and wrap it yourself; that keeps the whole basket cheap.
8. DIY Charcuterie Board
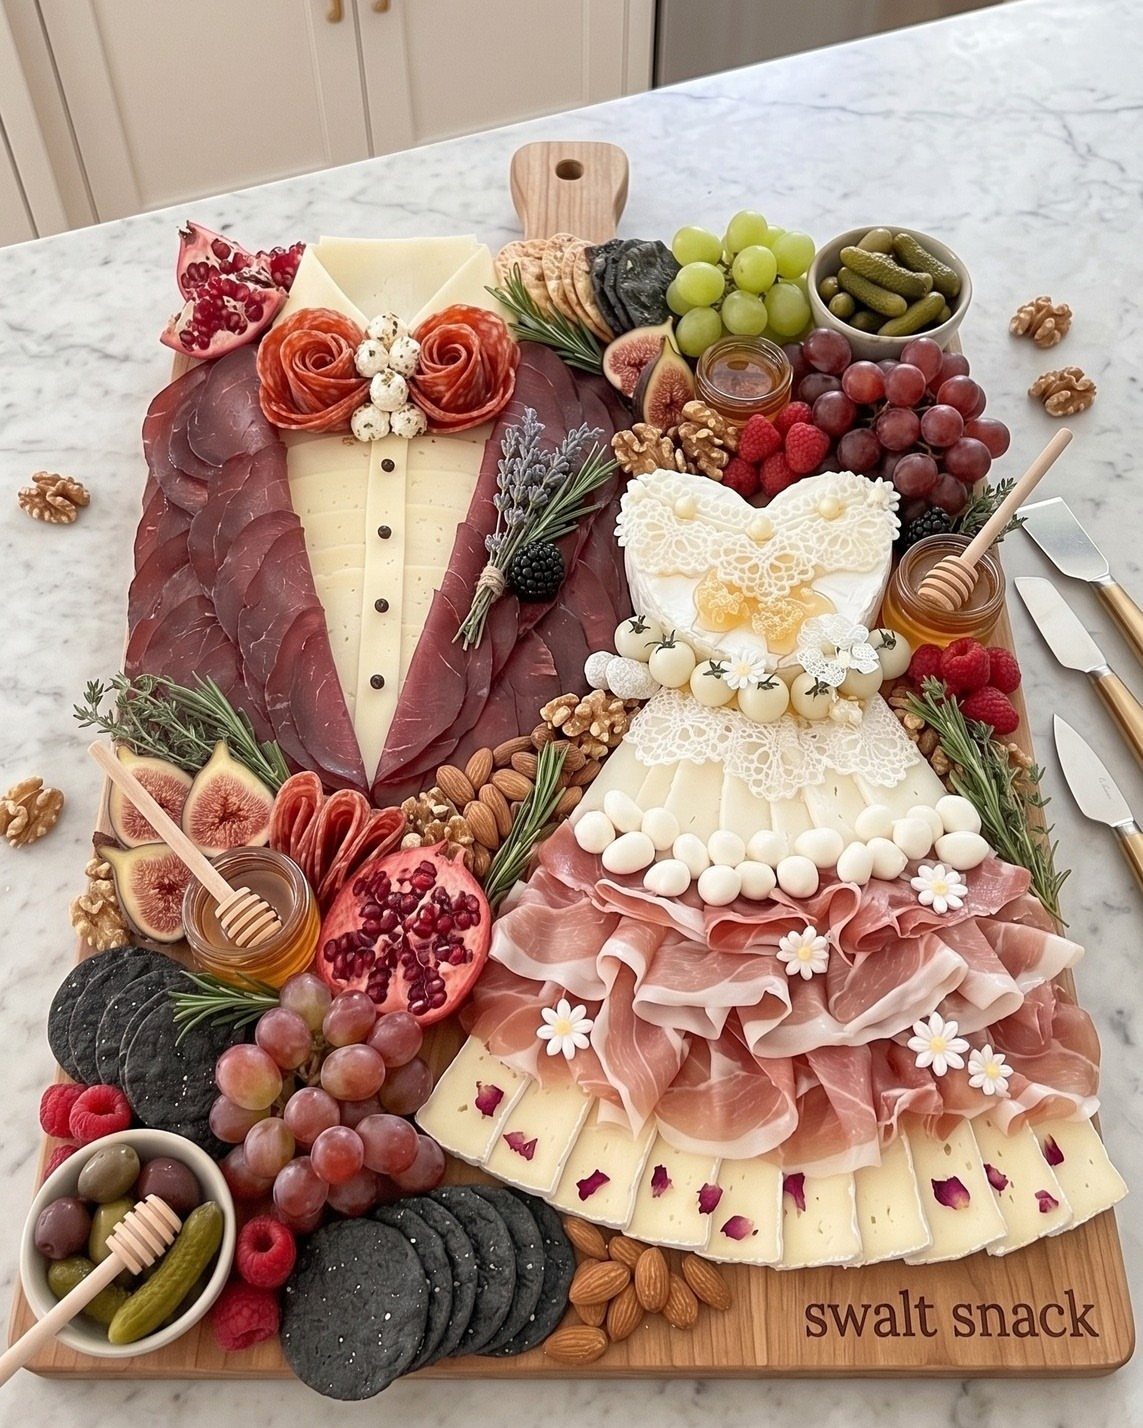
The shapes do the talking: a dark row for the suit, a pale fan of cheese for the skirt.
Sketch the figures on paper before touching the food, so you know how many slices each section needs. Firm cheeses and cured meats hold a shape better than soft ones.
A wooden board with a short printed phrase along the edge makes it feel like a gift, not just a platter.
9. DIY Recipe Box
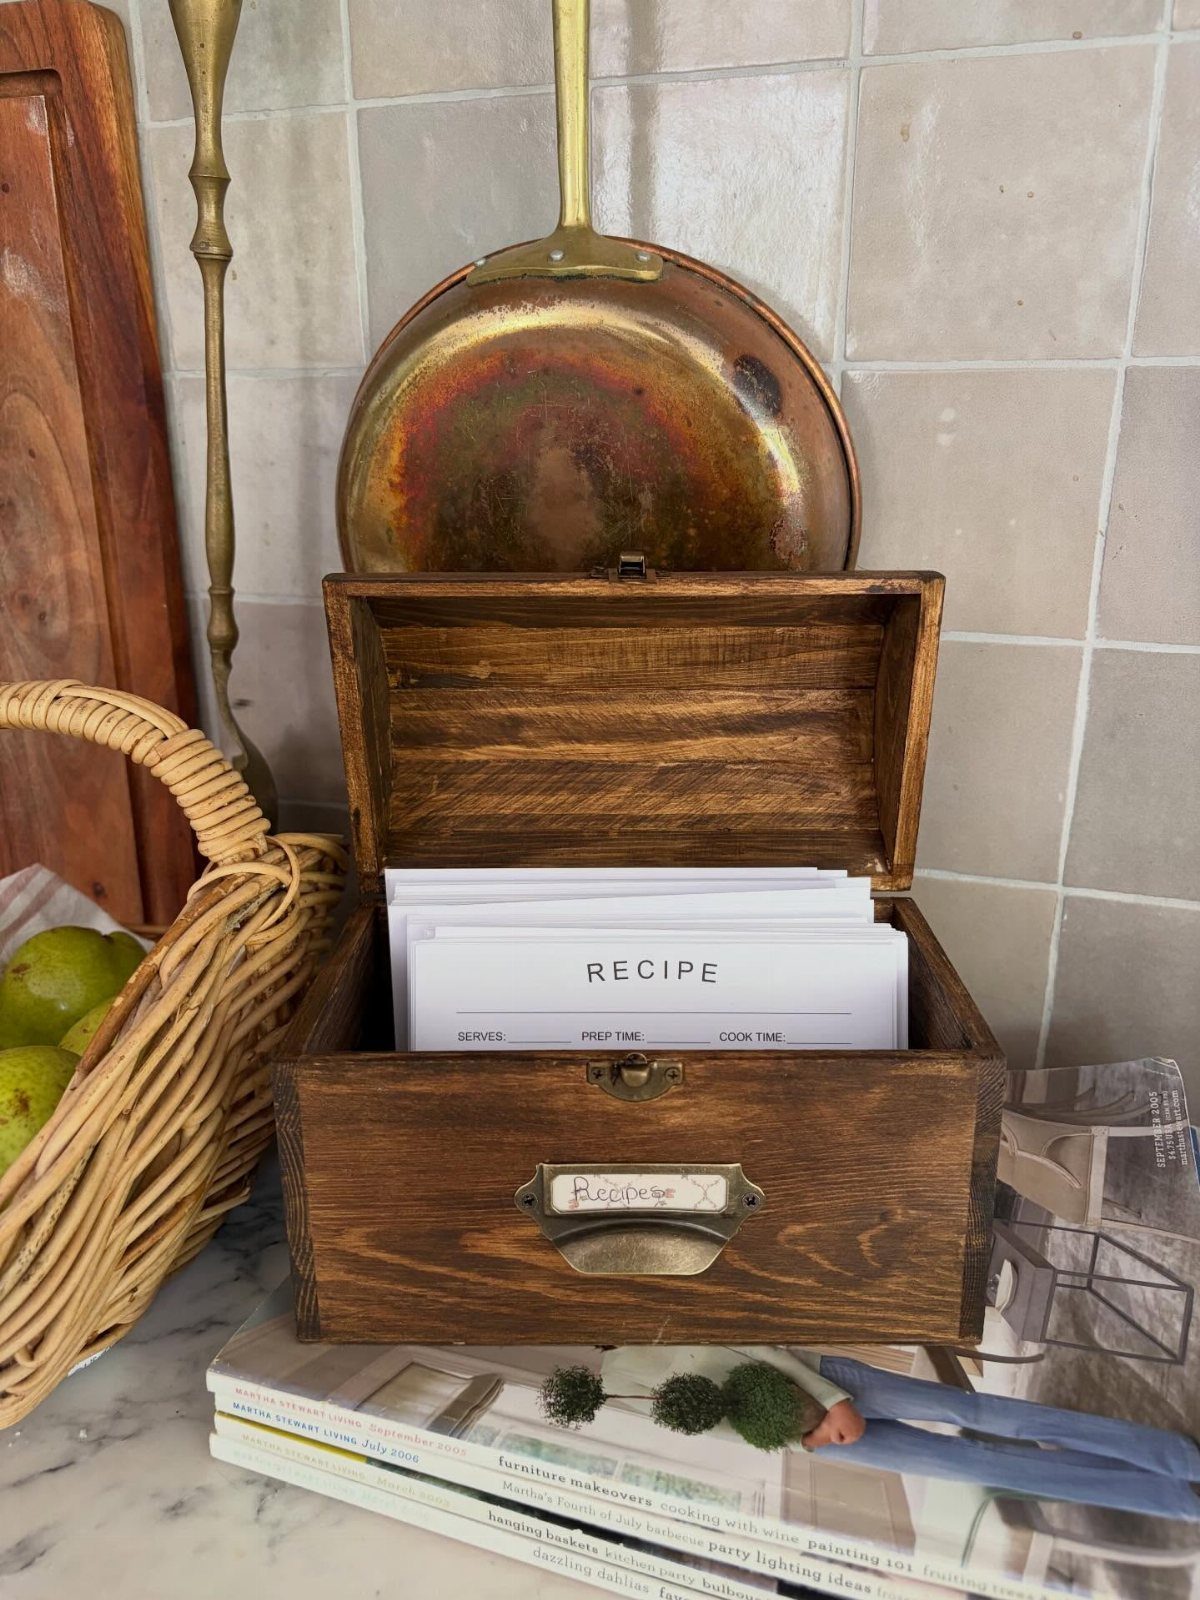
A wooden box labeled "Recipes" and filled with blank white cards gives a couple somewhere to start their own collection. Leaving the cards empty is the smart part, since they fill them over the years.
Writing out a few of your own favorites on the first cards adds a personal touch for almost no money. Use one card size throughout so everything fits and stacks neatly.
I would keep the lettering on the lid simple, because plain wood looks good in nearly any kitchen.
10. DIY Wine Rack
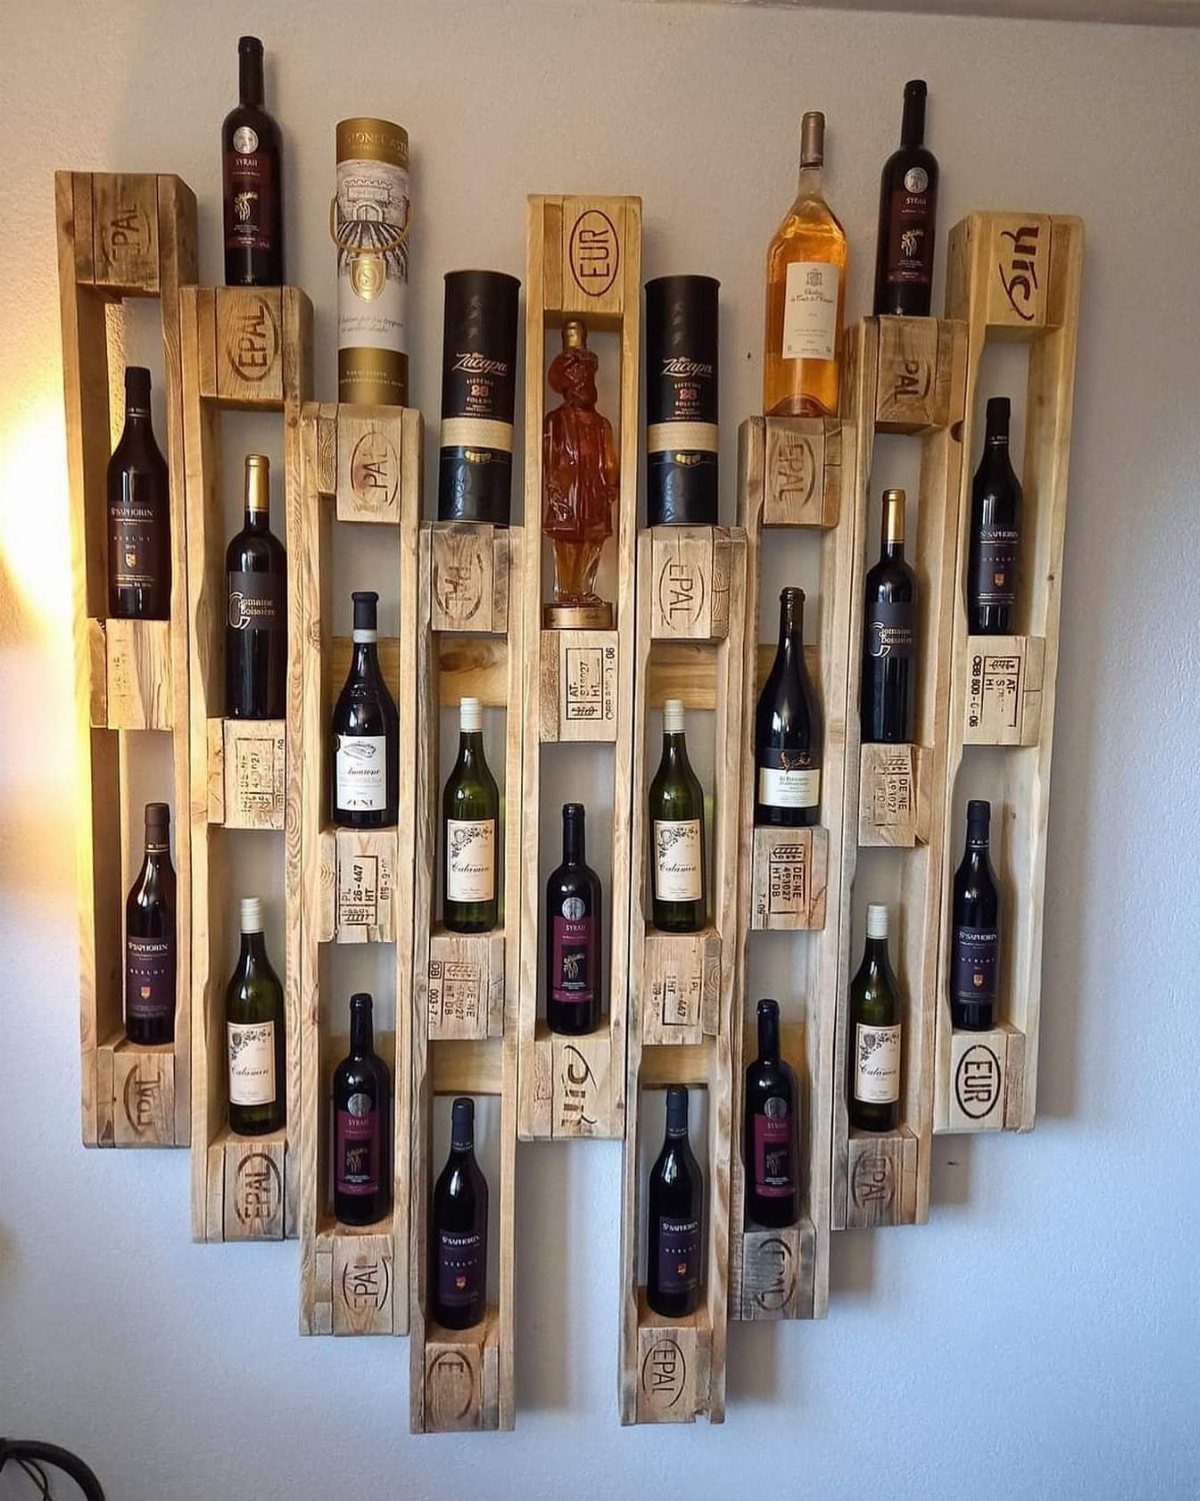
Pallet slats, stamped with marks like "EPAL" and "EUR," become a wall rack that holds several bottles at once. Leaving those stamps visible gives it an honest, salvaged look I prefer over sanding everything clean.
Pallet wood is cheap or free, which suits a small budget. Sand the rough edges well before assembly, and mount the rack into the wall securely, since full bottles are heavy.
Fill it with a few bottles as part of the gift, and it is ready to hang.
11. DIY Wine Bottle
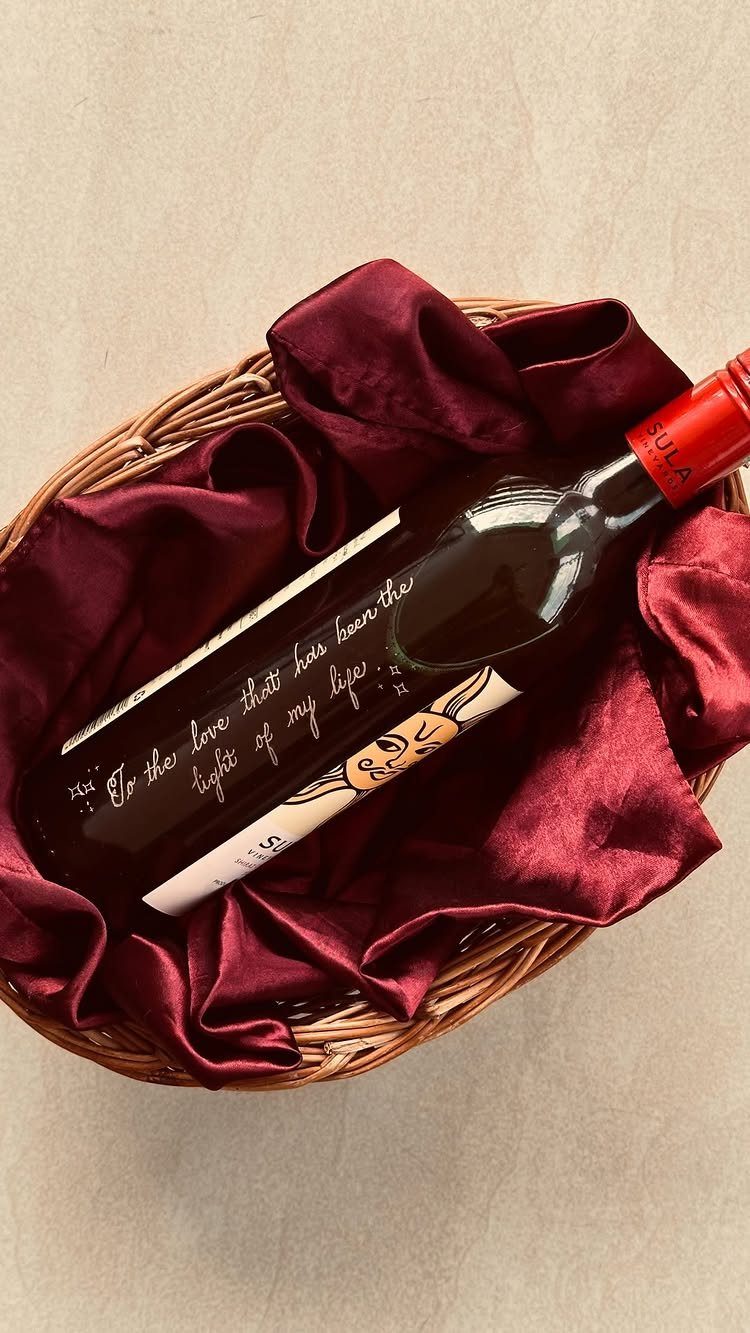
A handwritten note tied to a bottle does more than any label could.
Write a short, personal line on the label, something like "To the love that has been the light of my life," and set the bottle in a basket lined with fabric.
Pick wording that sounds like you, and write it by hand on a card or directly on the label. Keep it to a line or two so the handwriting stays neat.
The lined basket is an easy upgrade that makes one bottle feel like a full gift, at very little cost.
12. DIY Housewarming Basket
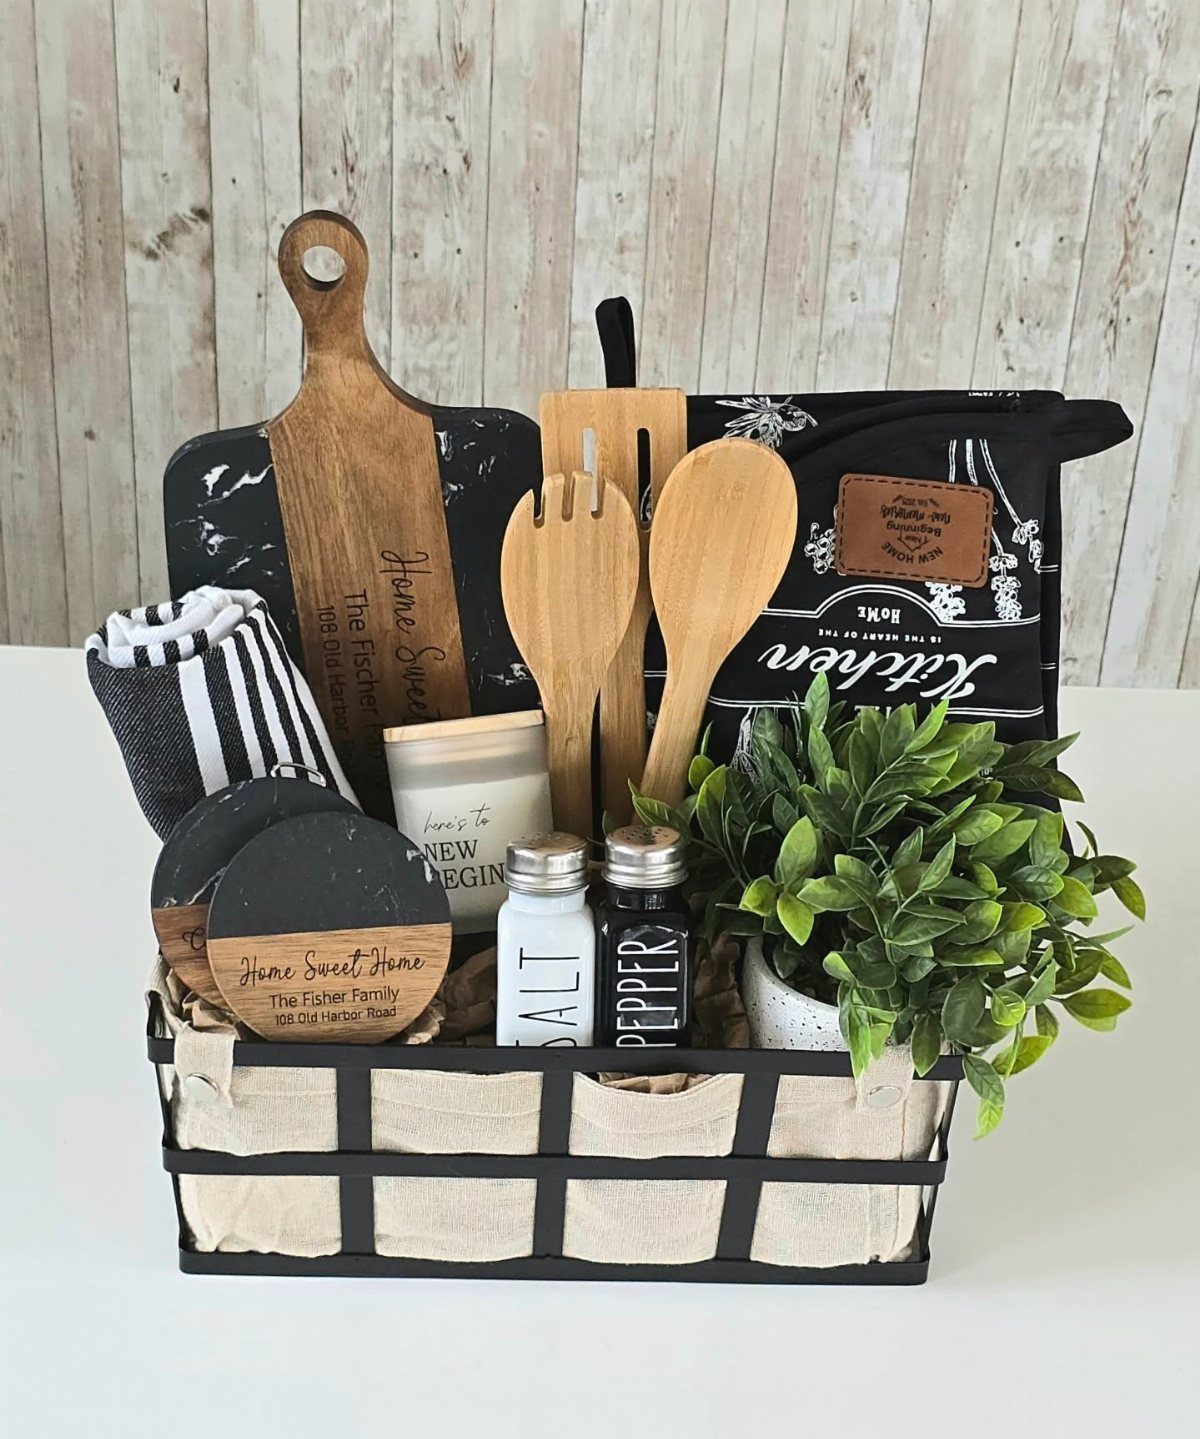
Engraved boards reading "Home Sweet Home The Fisher Family" turn a pile of kitchen basics into a first-home gift.
The family name is what sells it, so confirm the spelling before ordering any engraving. Engraving costs extra, so I would spend there and keep the other items simple.
Choose a sturdy basket that the couple can reuse afterward.
13. Wedding Keepsake Shadow Box
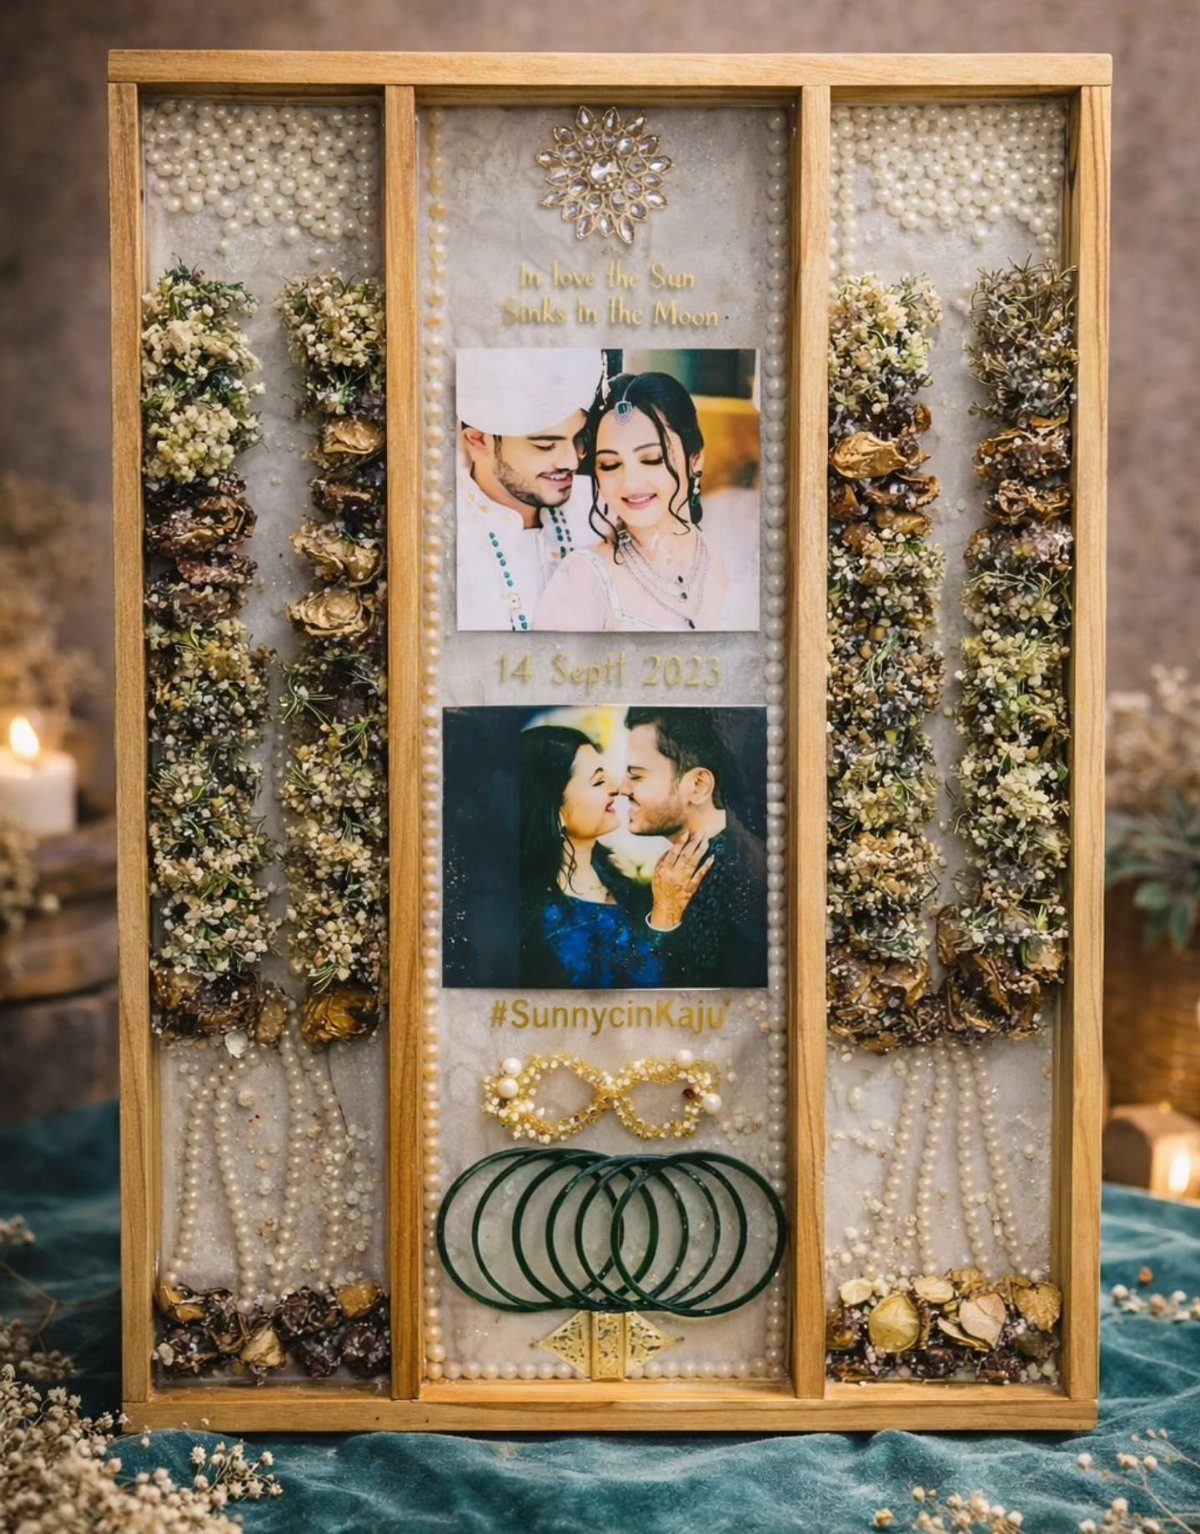
Photos, a date, jewelry, dried flowers and pearls all fit in one wooden frame, which makes a shadow box the best way to keep a wedding in three dimensions. The date, "14 Sept 2023," anchors the whole arrangement.
Keep the layout loose until you are sure.
I would lay everything out on a flat surface, move pieces around, and glue only after the balance looks right. Teal fabric behind the pieces makes the pale pearls and flowers stand out.
14. Custom Glass Tumbler
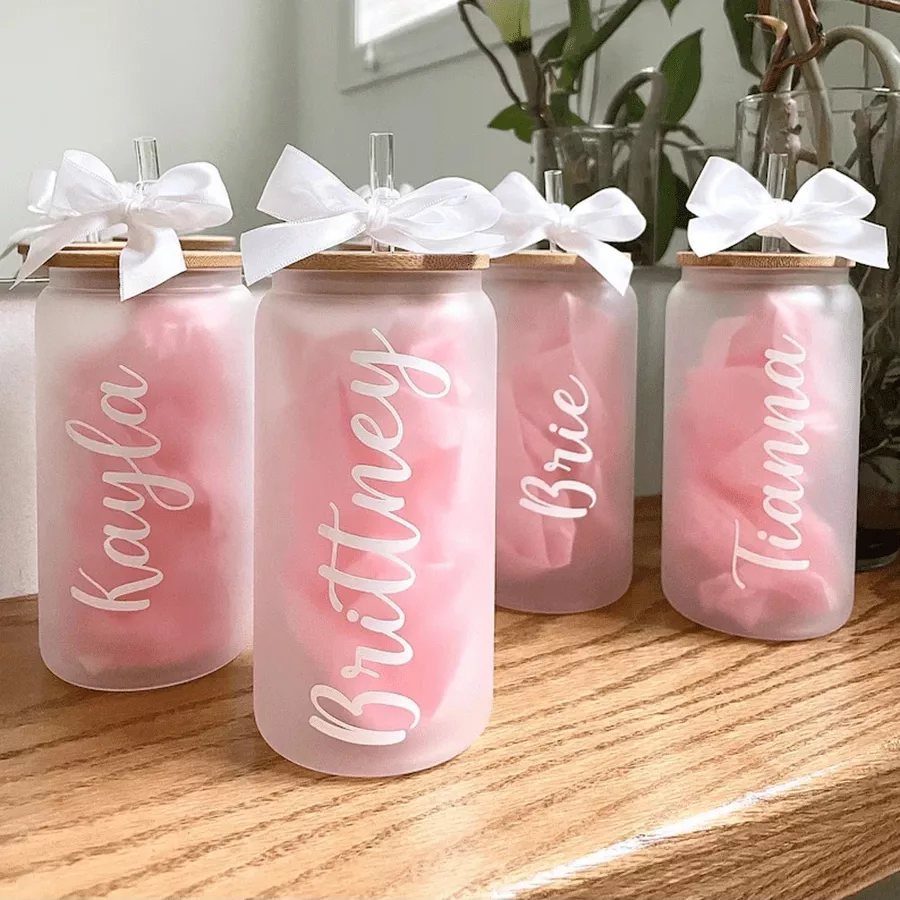
Frosted glass hides fingerprints, and white cursive names look crisp against it. A bamboo lid and a small white bow make each tumbler feel like a finished gift.
Names are the whole design, so check every spelling before you apply anything. A set of four, one per person, works well for a bridal party, and I like a matching bow on each so they read as a group.
Keep the lettering in one script and one color across the set.
15. DIY Decal Accent Mirror
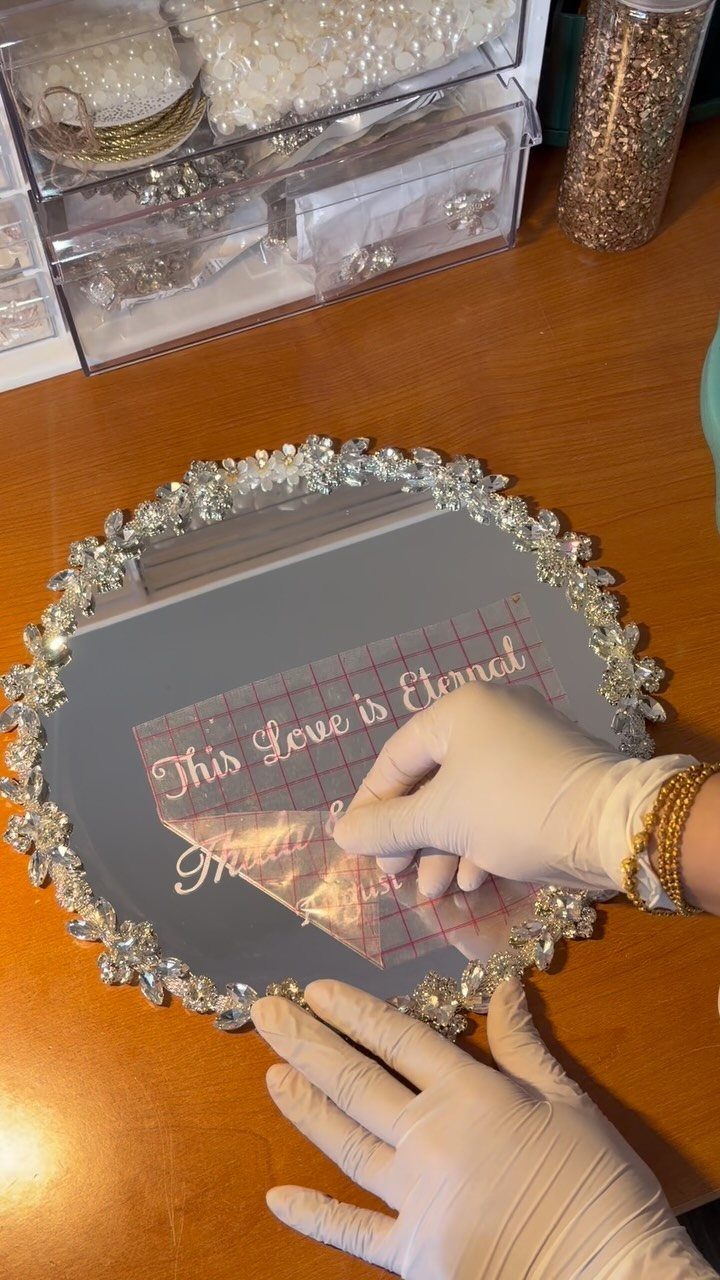
Transfer lettering turns a plain round vanity mirror into a keepsake, and a line like "This Love is Eternal" suits a crystal border well.
Gloves keep fingerprints off the glass, so put them on before you press the decal down.
Clean the mirror first, and press the decal down slowly from one edge to avoid bubbles. Peel the backing back gently.
Choose a short phrase.
The crystals already add plenty of sparkle, so the wording should stay quiet. A mirror like this costs little to personalize, so it suits a modest budget.
16. Acrylic Wedding Keepsake Block
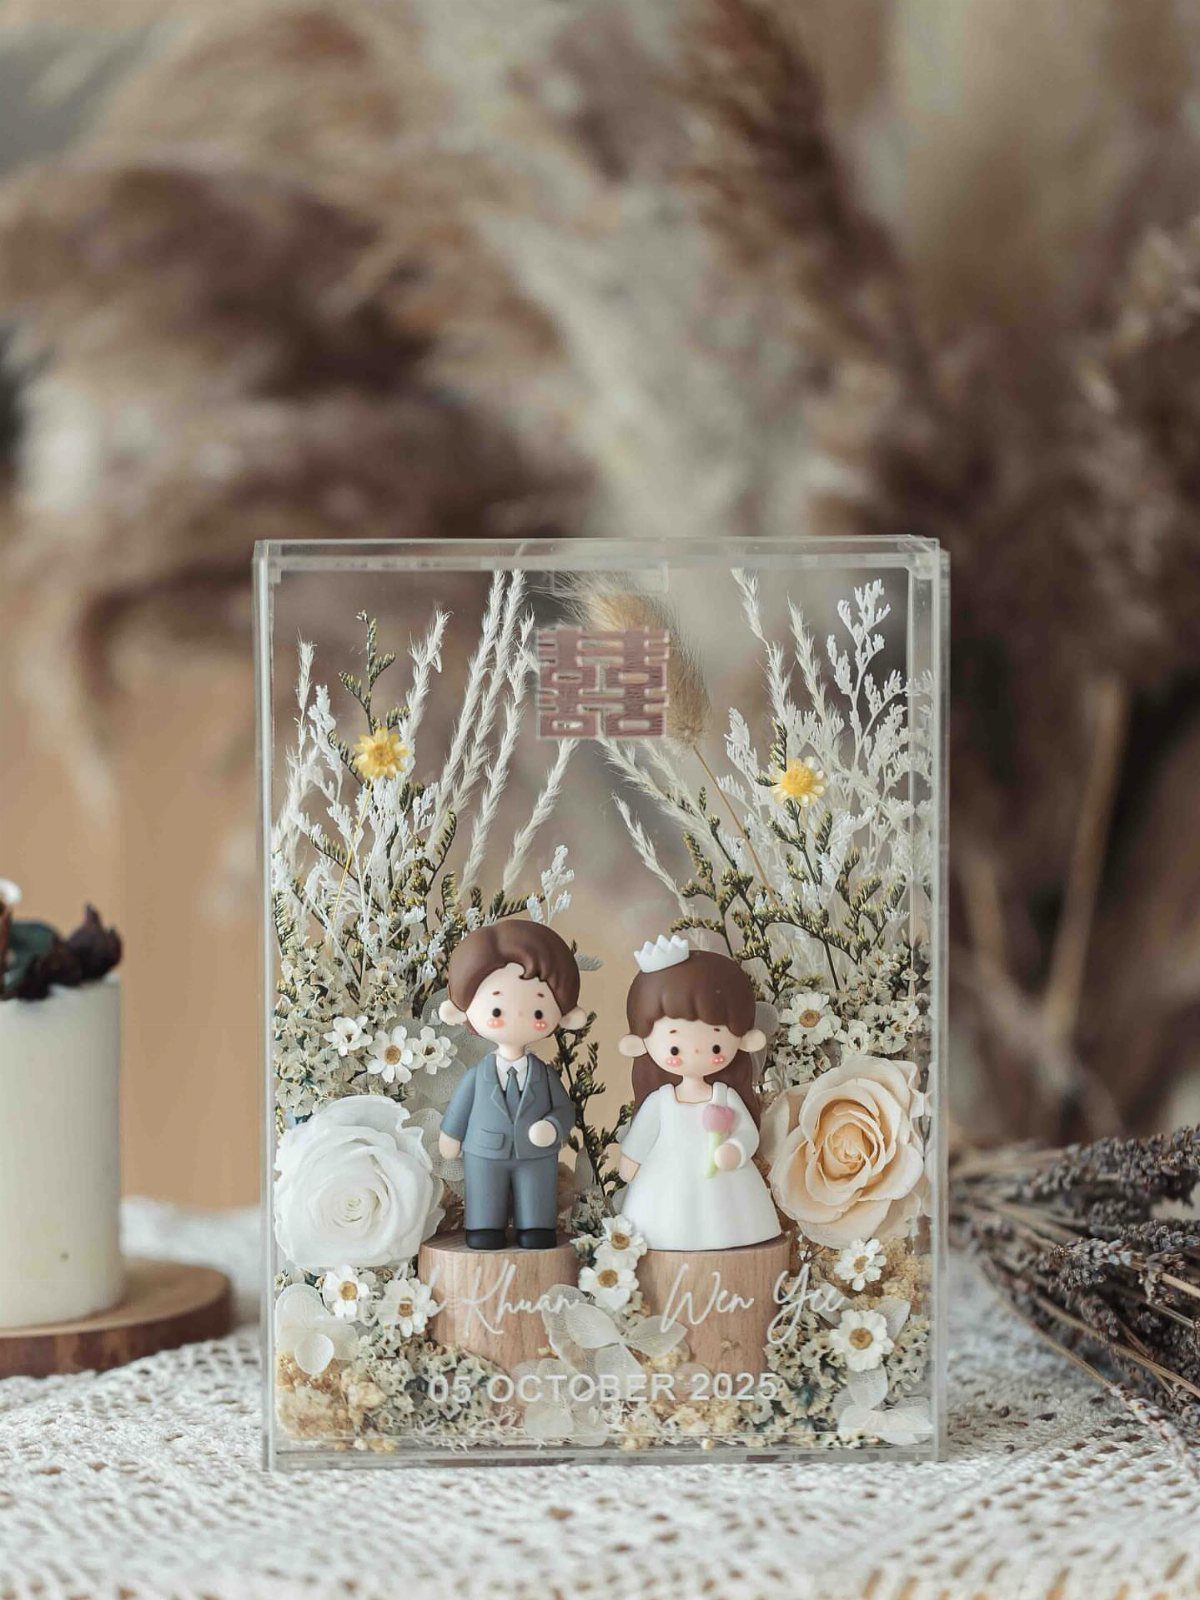
Two tiny bride and groom figures, dried flowers and a printed line with the couple’s names and wedding date sit suspended inside a clear acrylic block.
Tiny figures make the piece feel playful, and I prefer that to a solemn trophy look.
Put the names and date in plain, legible type. The flowers already add detail, so extra decoration would crowd the block.
Check the spelling of both names, including any two-part first names, before you order or print anything.
17. Resin Floral Coasters
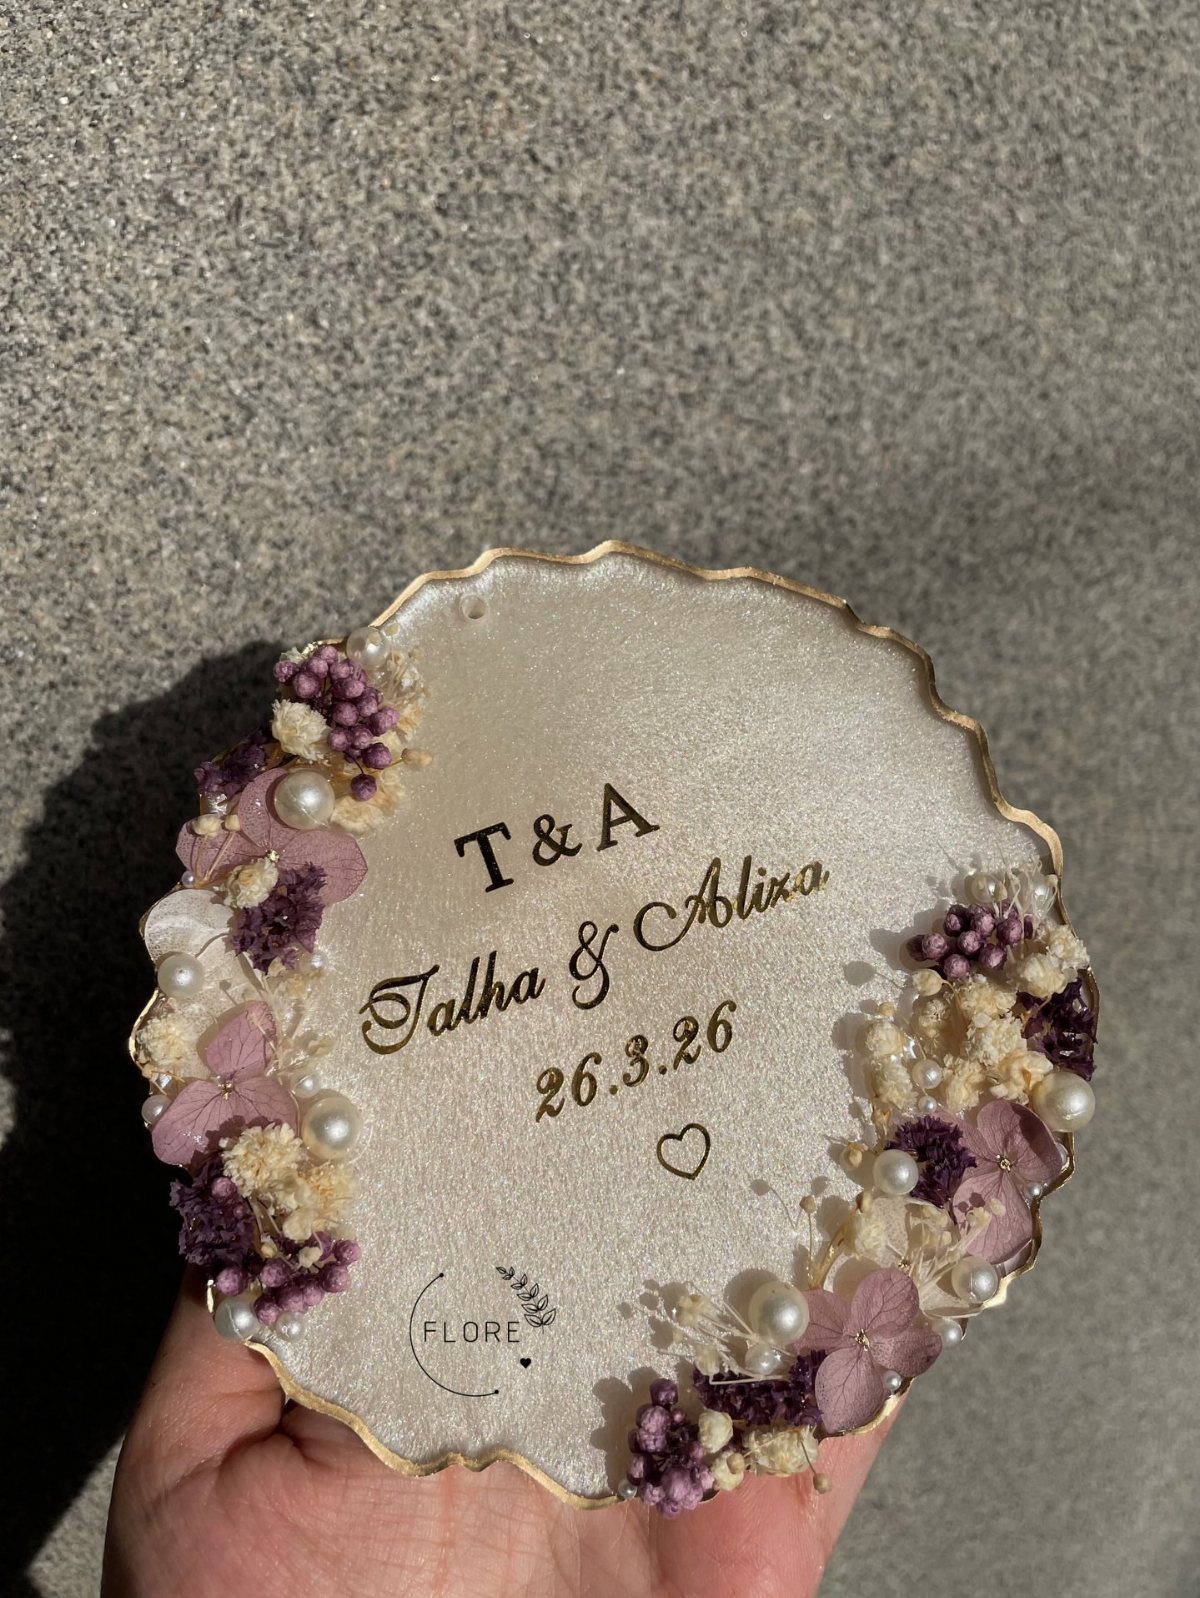
Dried purple flowers and pearls sealed in clear resin, with a gold rim around the edge, make a coaster that doubles as a keepsake. Initials, both names, a date and a small heart fit on the surface.
Keep the text short so the flowers still show.
Dry the blooms fully before they go into the resin. Making a full set gives the couple something to use every day.
Sticking to one flower color, as the purple does here, keeps the set looking cohesive.
18. Hand-Painted Commemorative Wedding Plate
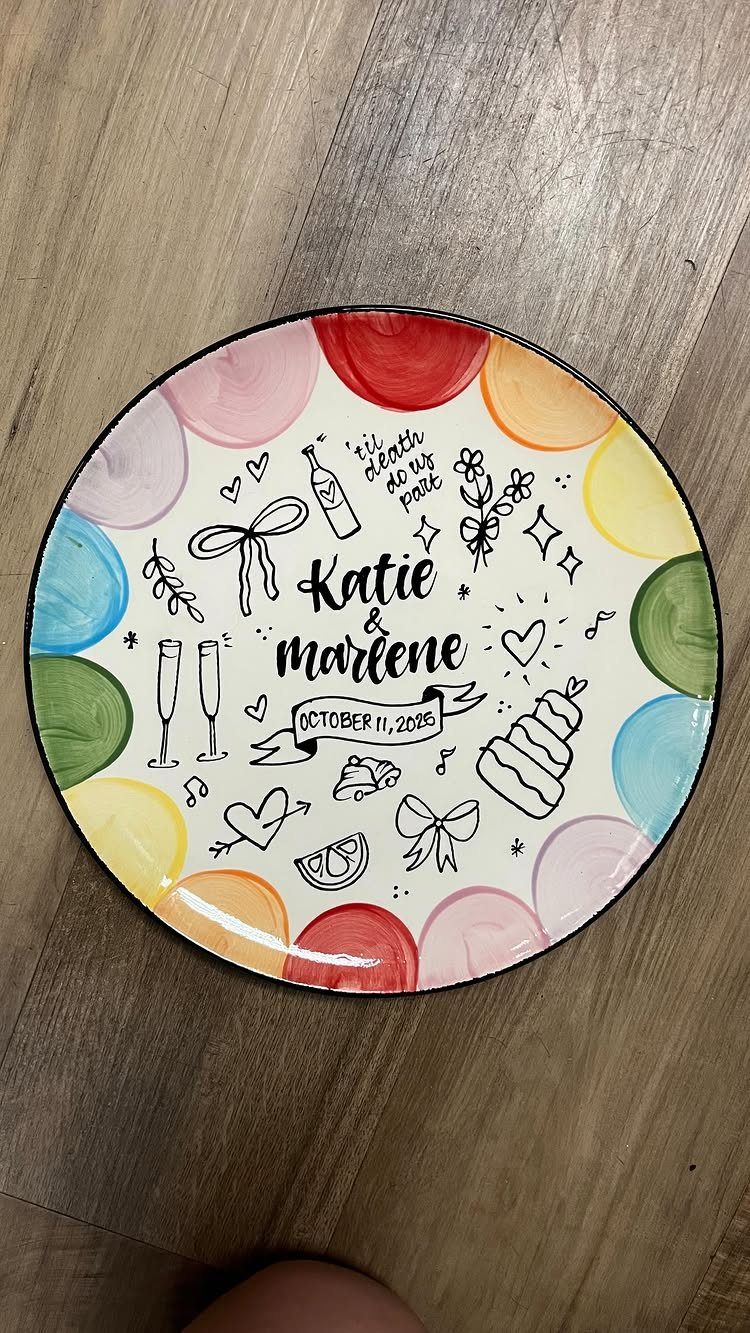
A plain ceramic plate becomes a one-of-one keepsake with names, a date and small ink doodles. Colorful circles around the border frame the center, and the black line drawings add personality without much skill.
Pencil the layout first: names and date in the middle, doodles around them. Drawings of things the couple loves beat generic hearts.
Practice the lettering on paper before touching the plate. A plate like this hangs on a wall or sits on a stand, so it keeps its place long after the wedding.
19. Personalized Patchwork Quilt
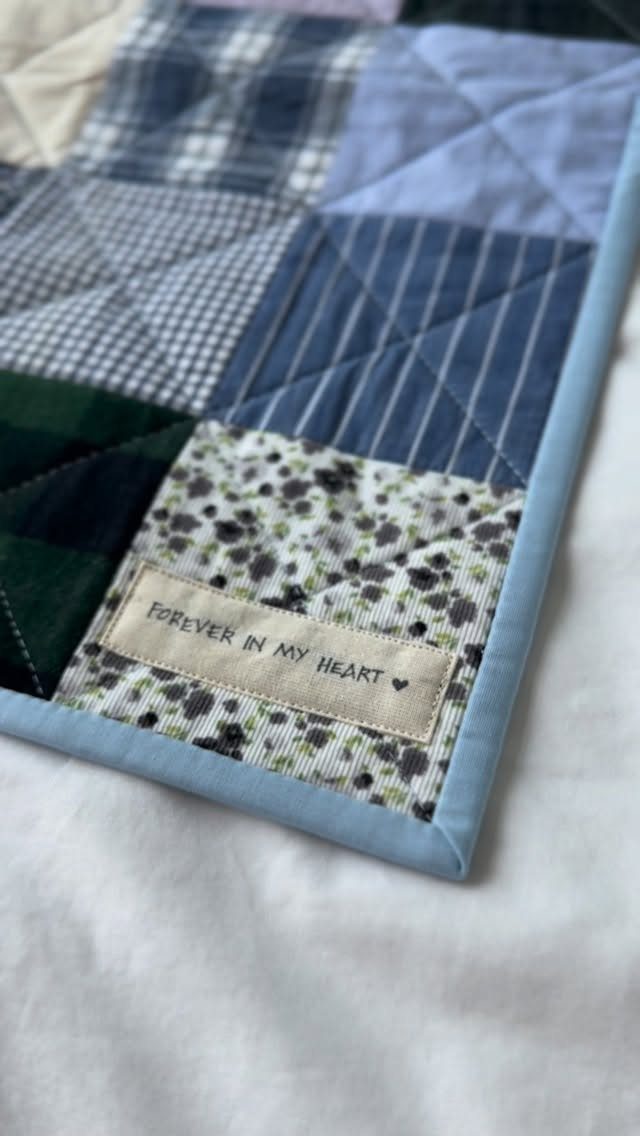
A white fabric patch reading "FOREVER IN MY HEART" with a small heart sits among blue and green squares, and that one embroidered message is what moves a quilt from blanket to keepsake.
Stitch the message on a separate patch before sewing it into the quilt top. A mistake then costs one small piece of fabric, not hours of work.
Keep the message short, and let the white patch stand alone among the patterned squares so the words read at a glance. Quilting takes time, so start early.
20. Bedazzled Cake Server and Flute Set
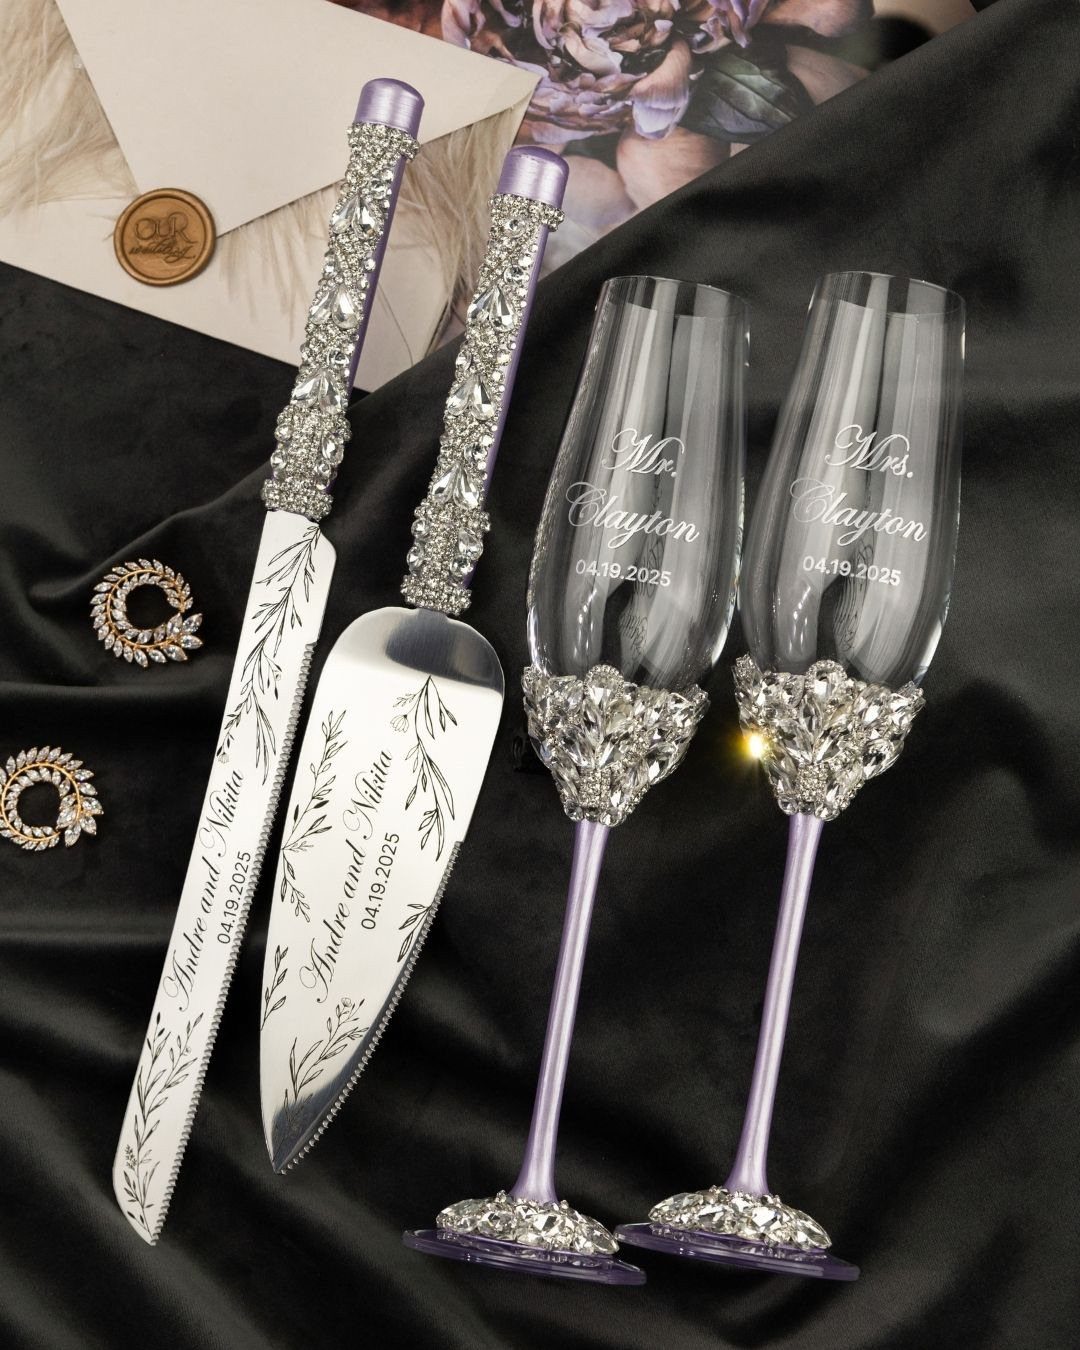
Rhinestones on a cake knife, server and 2 flutes make the cutting of the cake feel like a moment, and the same set comes back out every anniversary.
Engraving carries the personal part: "Mr. Clayton" and "Mrs. Clayton" on the flutes, with the date written 04.19.2025. Pick one date format and use it on every piece.
Check each name and the date before anything is engraved, since errors can’t be undone. Engraving adds cost, so I would keep the gems simple and spend there.
Photograph the set on dark fabric, as here, so the sparkle shows.
21. Personalized Ceramic Ring Dish
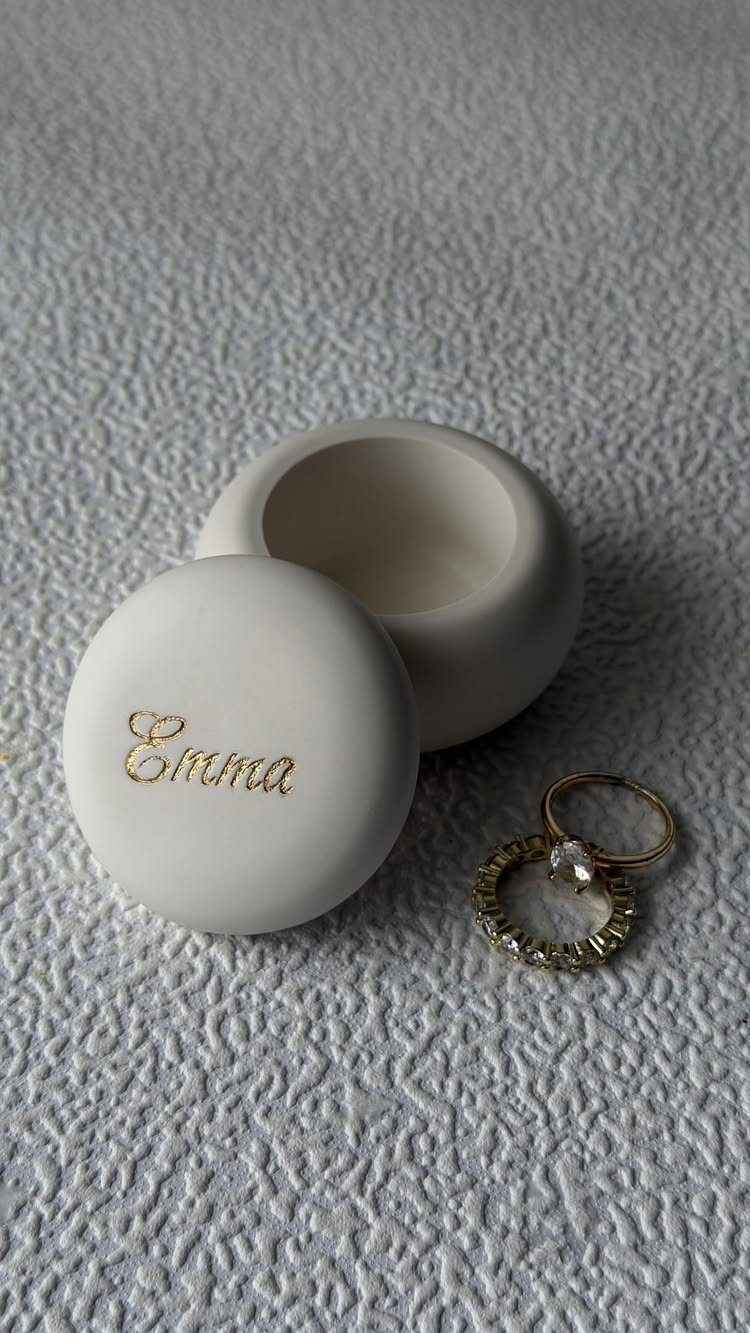
A name in gold script on a white ceramic lid gives a small trinket box a job: it holds the rings while the couple gets ready, then sits on a dresser afterward.
Gold on white looks best with one name and plenty of clear space around it. I would resist adding a date or border, since the small lid is already full.
Sketch the lettering on scrap paper until your hand knows the shape, then transfer it to the lid with a light pencil line or tracing paper.
Use a box with a smooth, flat top, which makes the script far easier to control.
Personalization Importance
A handmade gift tells the couple you spent time on them, and a receipt can’t say that. Even a simple project carries a message: you thought about their taste, their home, their habits.
Aim the personal part at something only you know. A joke from the engagement, a favorite flavor, a song title or the street where they met says more than any monogram.
Keep the effort honest, too. A modest gift made carefully beats an ambitious one finished in a rush, because crooked seams and smudges are what the couple will notice first.
Budget-friendly Options
DIY lets you cut the price without cutting the thought, since your time and creativity stand in for the markup on store goods.
Set a firm spending cap before you shop, then pick one project that fits under it. Buy basic supplies in small amounts and check what you already own: leftover paint, ribbon, jars and fabric add up.
Put any extra money into the one element that shows most, such as quality materials for the visible part, and keep everything else plain.
Gift Basket Ideas
A spa basket almost always lands well, but it only looks planned when one theme ties it together, say lavender and eucalyptus, so the items read as a set and not a pile.
Choose one idea, such as relaxation, and let every item serve it.
Build around 4–6 items so each one has room to be noticed. Mix sizes: one larger piece, a few mid-size items and a small treat tucked in the front.
Add filler like tissue paper or shredded paper to prop things up, then finish with a tag naming the theme.